
OrbStack is a Mac app for running Docker containers. A container is an app packed with everything it needs, kept apart from the rest of your computer. Each container starts from an image, a download that holds the app and its files. Docker is the tool most often used to make and run them.
Docker containers rely on parts of Linux that macOS does not have, so on a Mac an app runs a small Linux system for them in the background. Docker Desktop is Docker’s own app for that job. OrbStack does the same job, is made only for the Mac, and adds a few things Docker Desktop does not set up for you, such as a web address for every container. You keep using the same docker and docker compose commands.
The steps below are for OrbStack 2.2.5, released October 23, 2026, on macOS 27. They take you from the install to a WordPress site that opens at its own address, then through the app window, Finder, the menu bar, and Settings.
Who can use OrbStack for free
OrbStack’s terms allow free use for “an individual using the software for personal, non-commercial purposes.” Freelancers, companies, non-profits, and government bodies must buy a license, and so must anyone who makes more than $10,000 a year from the related work. Those users may try OrbStack for up to 30 days “solely for evaluation purposes” before they buy.
Docker Desktop’s license is free for personal use, education, non-commercial open source projects, and small businesses with “fewer than 250 employees AND less than $10 million in annual revenue.” So a freelancer or a five-person company can use Docker Desktop for free but must pay for OrbStack. Colima and Podman are free, open source tools that also run containers on a Mac, at any company size.
What you need
You need a Mac on macOS 14 Sonoma or later. OrbStack has separate downloads for Apple silicon and Intel Macs. You do not need an account, and you do not need Docker Desktop or the Docker command line tools: OrbStack installs docker, docker compose, and its own orb command when it starts.
You type an admin password two or three times. The first is for OrbStack’s helper on first launch. The others come when macOS asks to trust OrbStack’s local certificate for https.
Install OrbStack and choose Docker
Download OrbStack from orbstack.dev/download and drag it to Applications, or install it with Homebrew:
brew install --cask orbstackOpen OrbStack from Spotlight or the Applications folder. A short Welcome screen comes first, with a line that says continuing means you agree to the terms and privacy policy, and a Next button. At the same time, macOS asks “Allow administrator access for ‘OrbStack’?” with Install Helper and Don’t Allow. The helper lets OrbStack point the standard Docker socket, /var/run/docker.sock, at its own engine, so other tools find it. Click Install Helper and type your password. You can turn this off later in Settings under System, “Use admin privileges for enhanced features.”
After Next, OrbStack asks “What do you want to use?” with three cards: Docker, Kubernetes, and Linux. The screen adds that you can change this later. Pick Docker.
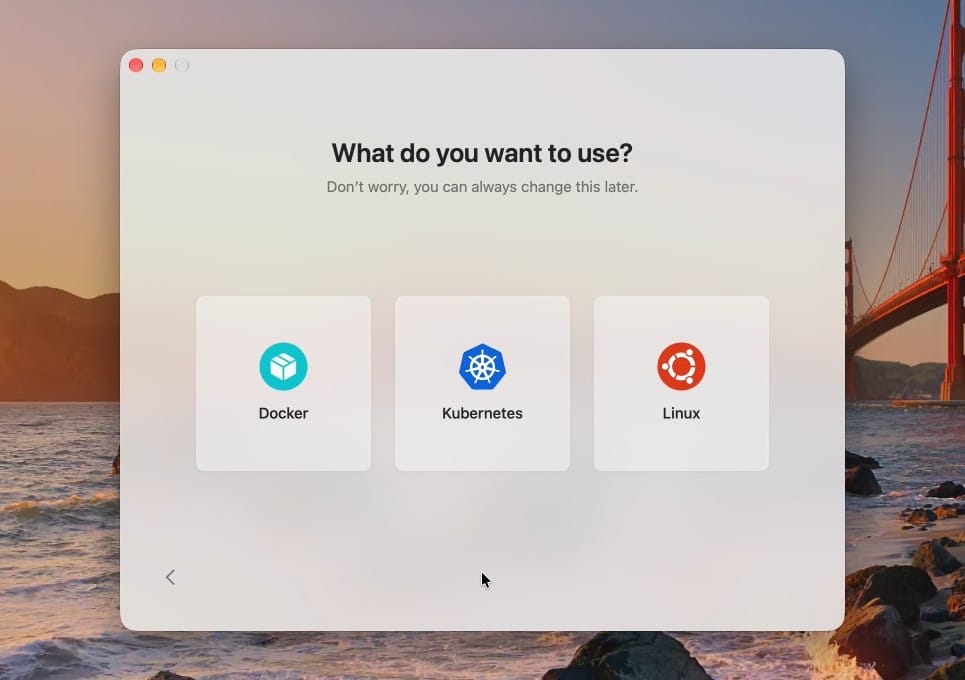
Kubernetes is a tool for running groups of containers across many computers; OrbStack can run a Kubernetes cluster on your Mac, and you can turn it on later in Settings. The Linux card is for Linux machines, full Linux systems such as Ubuntu that OrbStack runs next to your containers. OrbStack’s architecture page says they are “not independent VMs” and share one kernel.
The main window opens right away, with no sign-up step. macOS may show two notices at this point: one asks to allow OrbStack’s notifications, and one says OrbStack can run in the background.
The bottom-left corner of the window reads “Sign In” and “Pro Trial (29 days)”. A new install starts a 30-day trial of the paid version. When it ends, OrbStack stays free for personal use, and Sign In is only for a license you have bought.
Start a WordPress site with Docker Compose
WordPress is a system for building blogs and websites, and it keeps its posts in a database. A WordPress site needs two containers that work together: one for WordPress and one for the database.
A compose file is a short text file that lists the containers a project needs. Docker’s awesome-compose collection has one for WordPress. Open Terminal, make a folder for the project, and download the file into it:
mkdir wordpress-mysql
cd wordpress-mysql
curl -O https://raw.githubusercontent.com/docker/awesome-compose/master/wordpress-mysql/compose.yaml
cat compose.yaml
The file defines two services. db uses the mariadb:10.6.4-focal image (MariaDB is a MySQL-compatible database, and this image runs on both Apple silicon and Intel) and keeps its data in a volume named db_data. wordpress uses wordpress:latest. The passwords in the file, such as somewordpress, are sample values; change them before you use the setup for anything real.
Now start both containers:
docker compose up -dDocker downloads both images, creates a network and the db_data volume, and starts the two containers. The -d flag runs them in the background, so you get the prompt back.
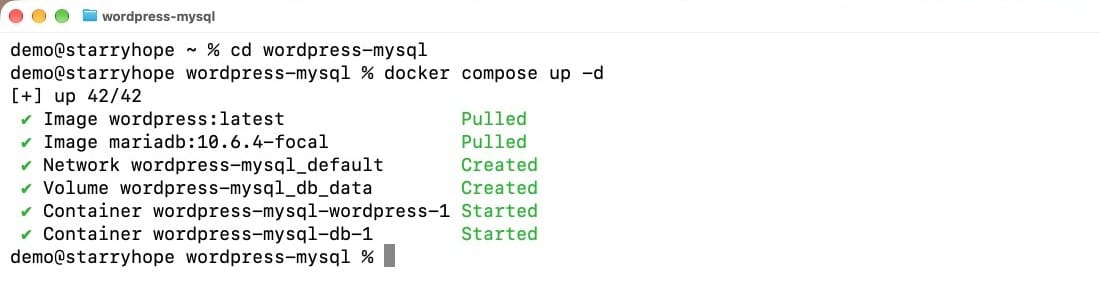
Switch back to OrbStack. Under Containers, both containers show up together as one project, wordpress-mysql, named after its folder, with db and wordpress rows under it.
Open the site at its own address
OrbStack gives every container a name you can type into a browser. For a Compose project the pattern is the service name, then the project name, then .orb.local. Open this address in Safari:
http://wordpress.wordpress-mysql.orb.localThe WordPress setup page loads, asking you to pick a language. There is no port number in the address. A port is the number after a colon, as in localhost:8080, where localhost means your own Mac. With several projects running, those numbers get hard to keep track of. This sample also publishes port 80, so http://localhost opens the same site. The .orb.local name reaches the container directly, so it works even for a container that publishes no port.
Put https:// in front and the same page loads over a secure connection, with no browser warning:
https://wordpress.wordpress-mysql.orb.local

OrbStack makes its own certificate, the file a browser checks before it trusts a secure site, and handles the https connection for you. The first time you open an https address on a container, macOS says you are making changes to your Certificate Trust Settings and asks for your password for OrbStack Helper. The prompt can appear twice in a row. After that, every container’s https address works without a prompt. Safari hides https:// in its compact address bar; press command l to see the full address.
To see every address at once, open orb.local in Safari. It lists the running containers as links, here db.wordpress-mysql.orb.local and wordpress.wordpress-mysql.orb.local, plus host.docker.internal, the name a container uses to reach a service running on your Mac.
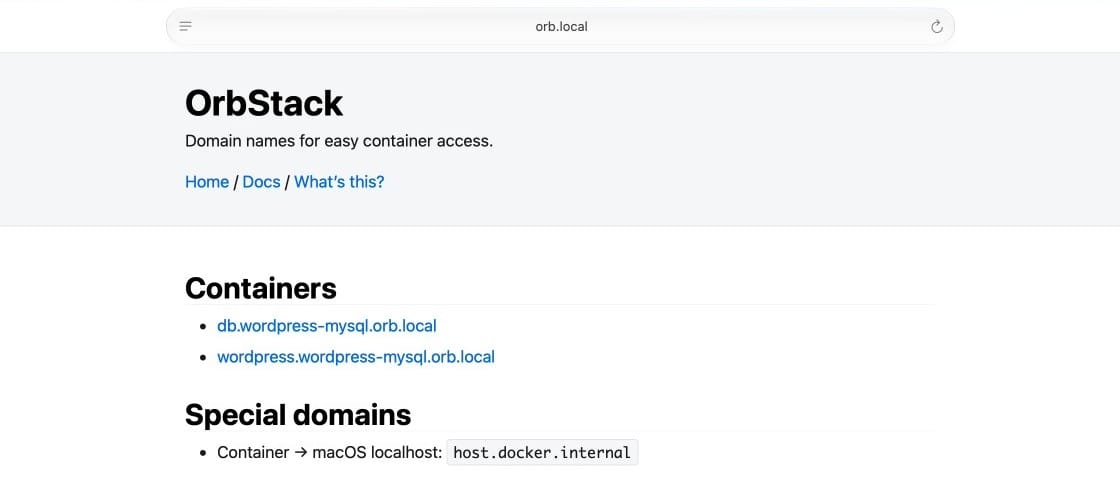
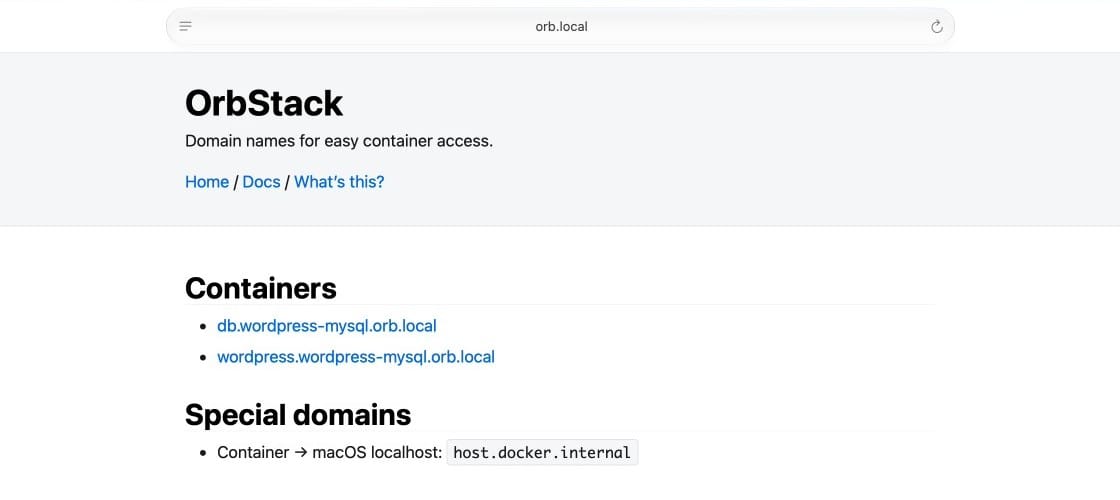
If you want a shorter name, OrbStack’s domains documentation covers custom names with the dev.orbstack.domains label.
Check on containers in the app window
Select the wordpress row, and the tabs along the top fill with its details: Info, Stats, Logs, Terminal, and Files.
Logs is the running record of what the app inside the container prints. For WordPress it shows the web server starting and each page request, and it is the first place to look when a site does not load. Files lets you browse the folders inside the container, a bit like Finder.
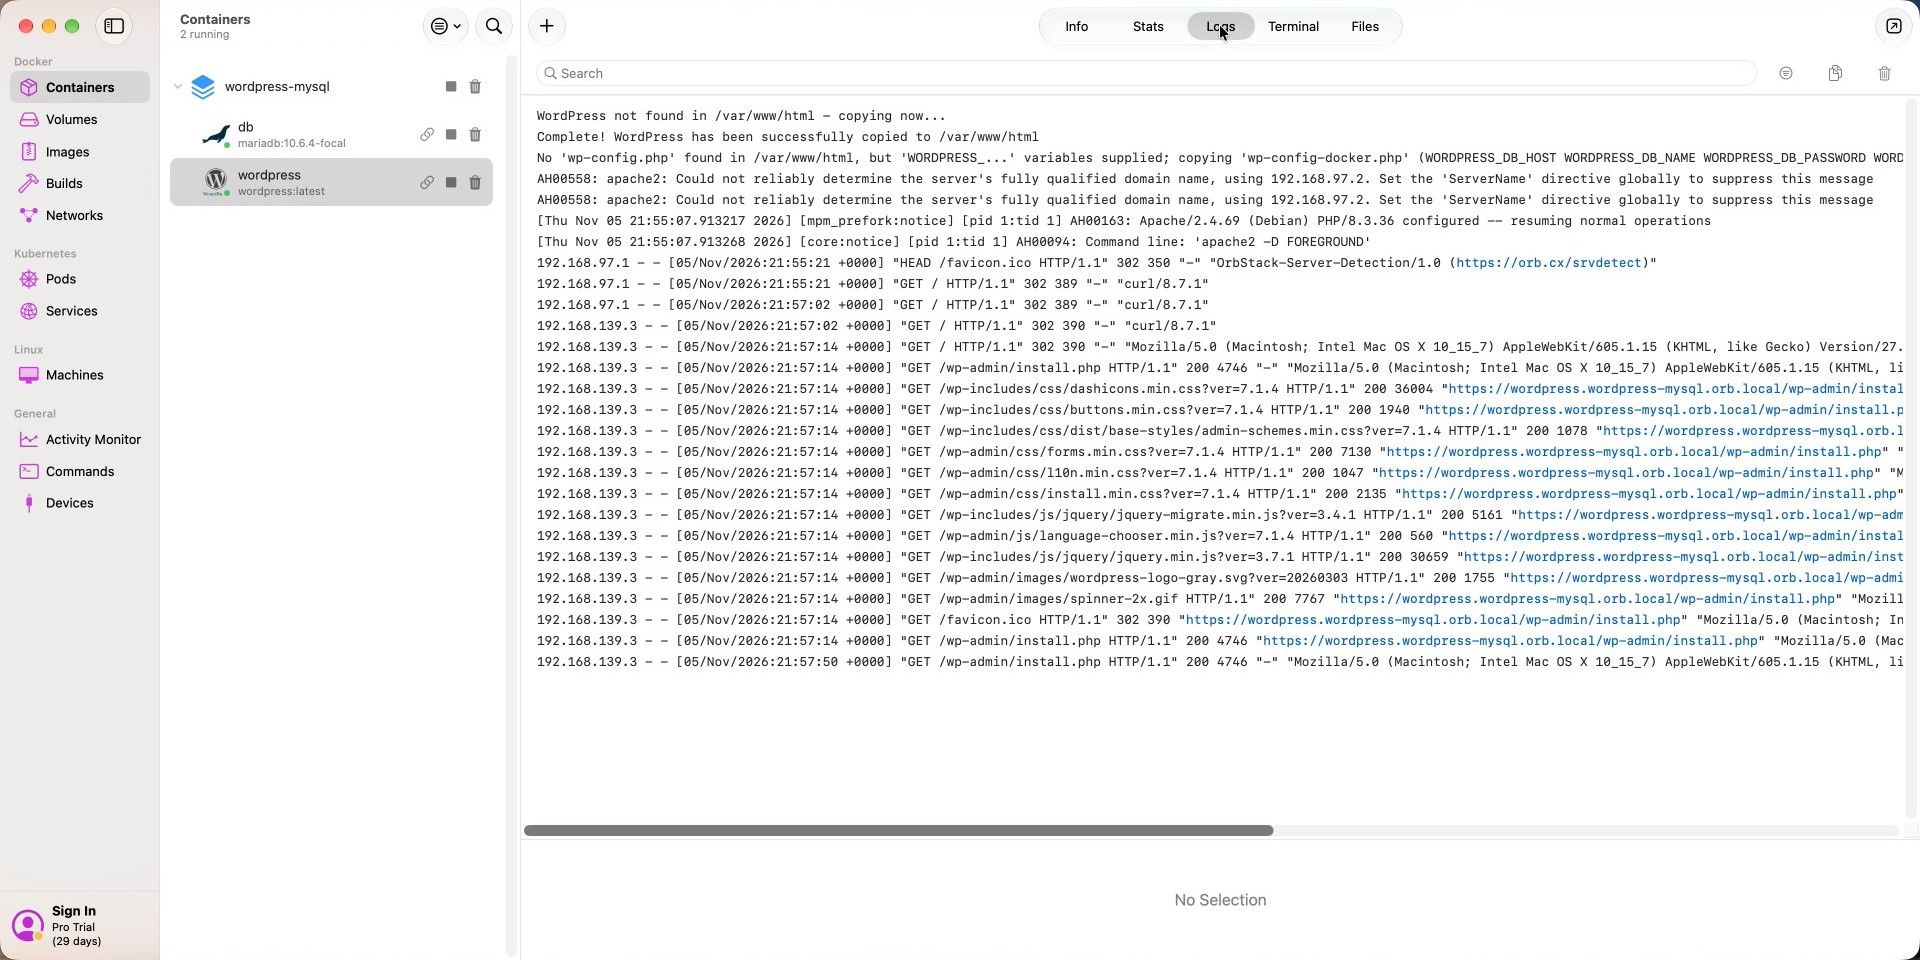
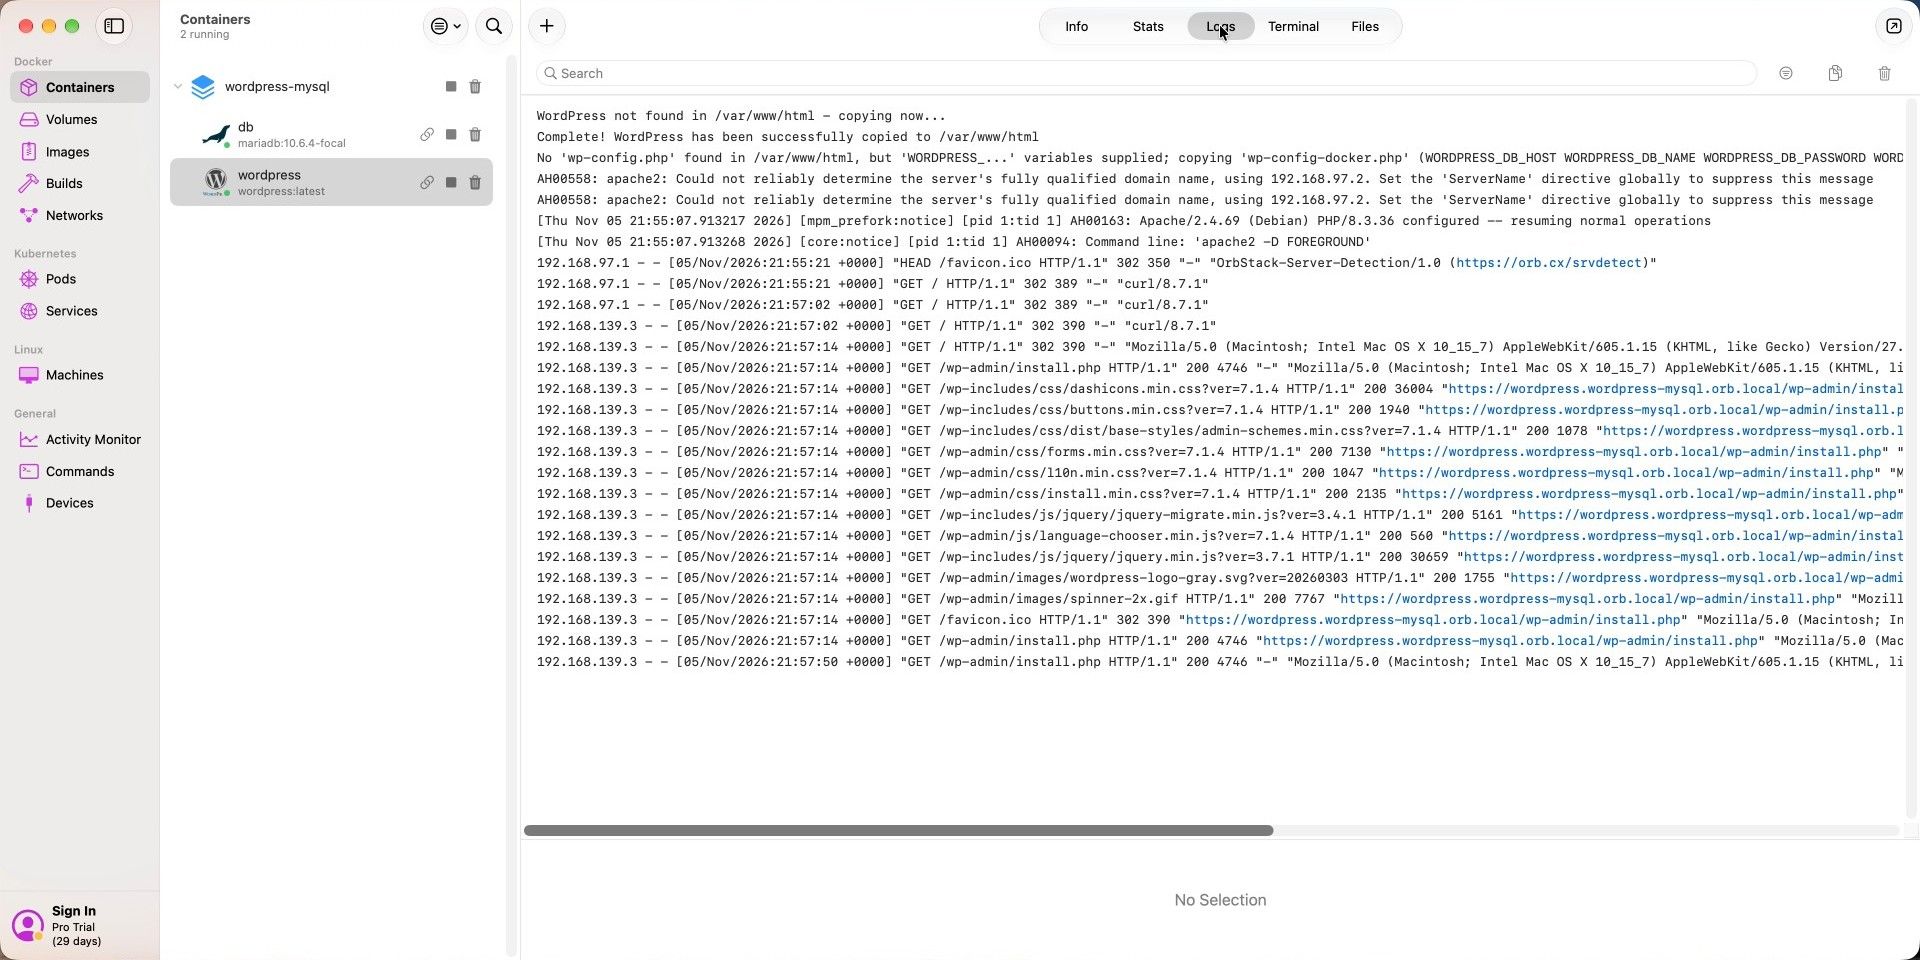
Each container row also has a link icon for its address, plus stop and delete buttons. The project row has stop and delete buttons for the whole project.
Find a volume’s files in Finder
Volumes are where containers keep data they need to hold on to. The database’s volume keeps the site’s posts when the container is removed or rebuilt. In OrbStack, click Volumes in the sidebar. The list shows wordpress-mysql_db_data and an unnamed volume that the WordPress image creates for its own files.
Right-click wordpress-mysql_db_data and choose Show in Finder. A Finder window opens on the database’s own files: folders such as mysql and wordpress, and files such as ibdata1.
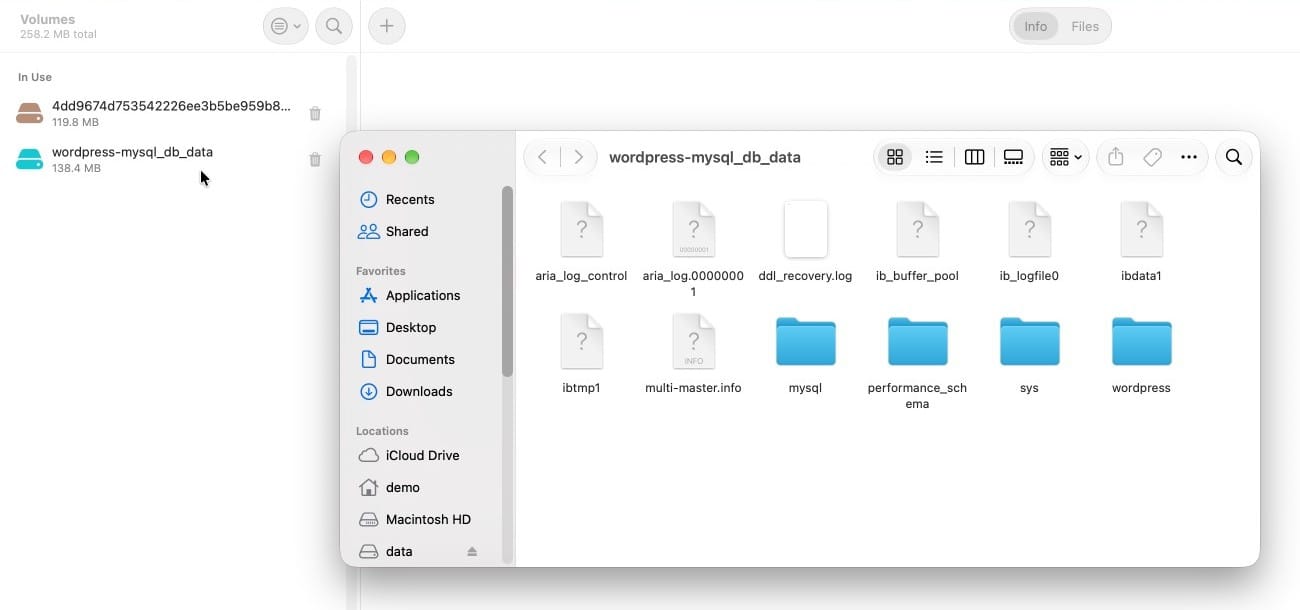
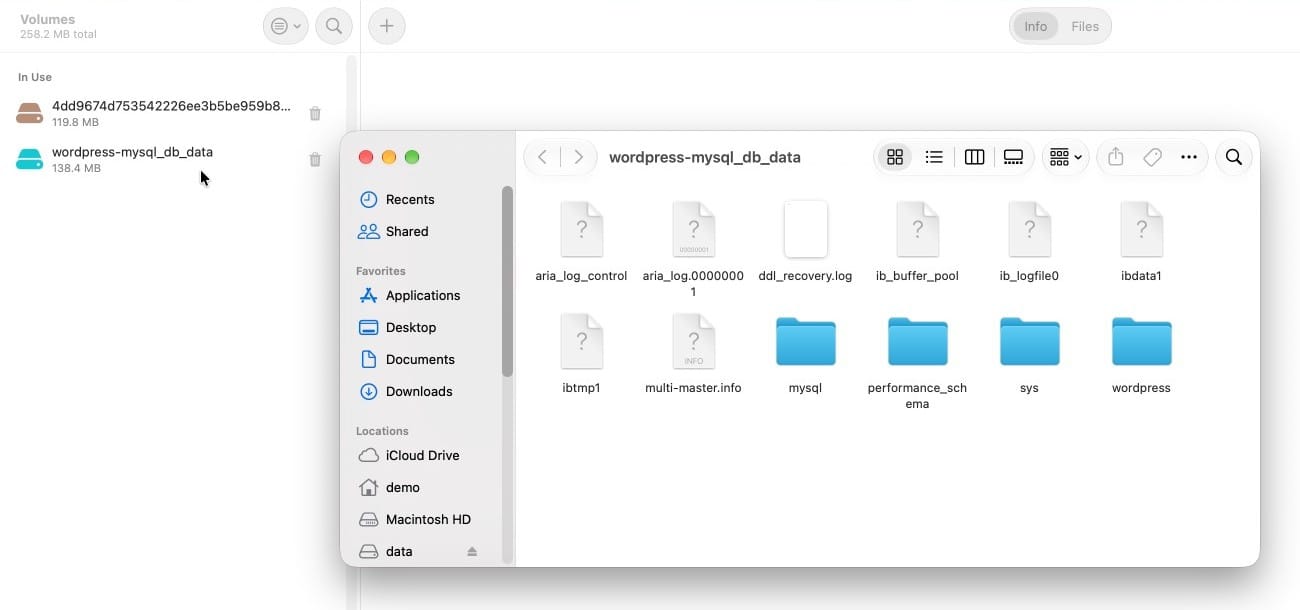
The same files are in your home folder at ~/OrbStack/docker/volumes, and images are at ~/OrbStack/docker/images (file sharing docs). Read and copy files there as you like, but stop the database before you change anything in its volume.
Start and stop projects from the menu bar
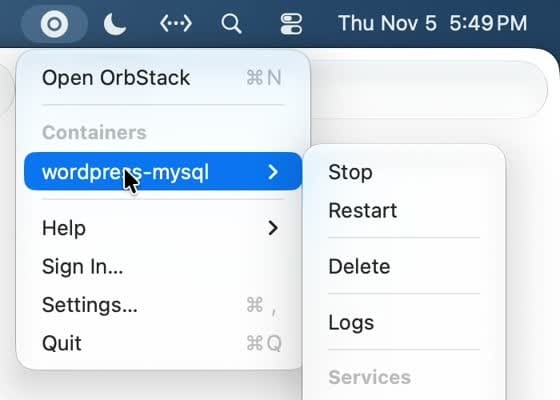
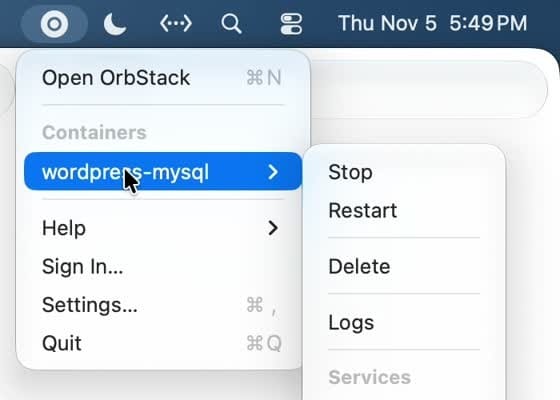
OrbStack puts an icon in the menu bar at the top right of the screen. Its menu lists your projects under Containers. Point at wordpress-mysql for Stop, Restart, Delete, and Logs, without opening the main window. The same menu has Open OrbStack, Settings, and Quit.
Settings for memory, battery, and network
Open Settings from the OrbStack menu or with command , . The System page is the one to check if you care about your Mac’s memory and battery.
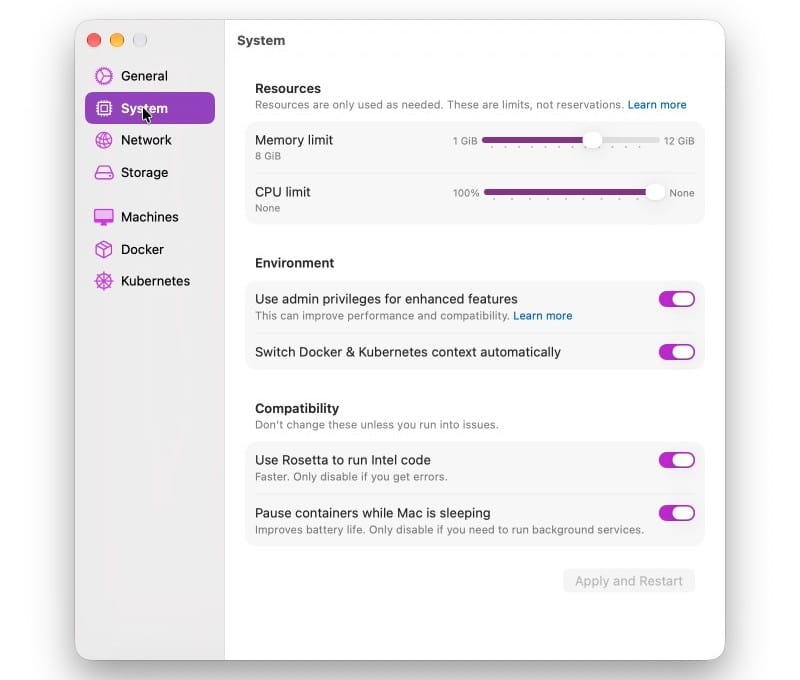
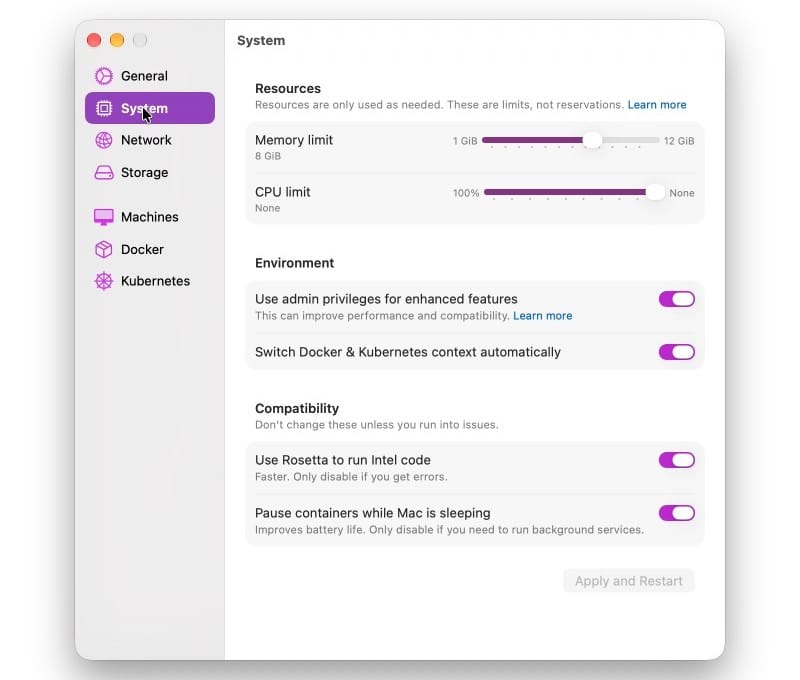
Under Resources, the page says “Resources are only used as needed. These are limits, not reservations.” The memory and CPU sliders set the most OrbStack may use; it does not take that much up front. Lower either one to leave more room for your other apps. A change applies when you click Apply and Restart.
“Pause containers while Mac is sleeping” is on by default, and the setting itself says it improves battery life. Turn it off only if a container must keep working while the Mac sleeps.
The Network page has the switches the web addresses depend on: “Allow access to container domains & IPs” and “Enable HTTPS for container domains.” Both are on by default. The Kubernetes page has one switch, “Enable Kubernetes cluster,” for when you want it.
OrbStack says on its home page that it “starts in seconds” and has “minimal memory consumption,” and its speed chart dates from its own August 2023 test. DDEV’s October 2026 comparison of Mac Docker providers found OrbStack close to Docker Desktop, Colima, and the others when file syncing was on, and concluded that “your choice of Docker provider is mostly not a performance decision anymore.”
Move over from Docker Desktop
If you already use Docker Desktop, OrbStack’s File menu has “Migrate from Docker Desktop…”. It copies your containers, volumes, and images into OrbStack and leaves the originals in Docker Desktop. The command line version is:
orb docker migrateIf OrbStack already has containers, it warns that replacing existing data “may lead to unexpected results or data loss,” so migrate before you start new projects in OrbStack. Two open bug reports affect the copy. Images stored with Docker Desktop’s containerd image store can be skipped without a message (issue #2699; the maintainer says a fix is coming in a future release). A migrated container may also start without its old volume attached (issue #1585). After a migration, compare docker images and docker volume ls with what Docker Desktop had, and check that a database container still has its data before you delete anything there.
You can also keep both apps and switch between them with Docker contexts. OrbStack’s install page gives the commands:
docker context use orbstack
docker context use desktop-linux
Stop Docker Desktop while you use OrbStack, so the two do not both hold memory.
Troubleshooting
OrbStack does not start after a restart on macOS 27. An open bug report (issue #2752) describes OrbStack failing at login with “scon host bridge failed: vmnet start timed out” on macOS 27.0.1 and 27.2, with OrbStack 2.2.4 and 2.2.5. Reporters say that starting OrbStack by hand after the failed start works.
An .orb.local address does not load. Open Settings, then Network, and check that “Allow access to container domains & IPs” is on. Check that the container is running in the app, and use orb.local to see the exact names.
docker still talks to Docker Desktop. OrbStack leaves existing Docker tools in place. Run docker context use orbstack, or remove the old tools (for example /usr/local/bin/docker*) and restart OrbStack so it can install its own.
Stop the site and clean up
To stop the WordPress site and remove its containers, run this in the project folder:
docker compose downThe db_data volume stays, so docker compose up -d brings the same site back. To delete the site’s data as well, add -v; this removes the volume and every post in it:
docker compose down -vTo remove OrbStack after a Homebrew install, quit it and run brew uninstall --zap --cask orbstack, which also deletes its data in ~/.orbstack and ~/OrbStack. Then open Keychain Access and look for the local certificate, “OrbStack Development Root CA,” in your login keychain. If it is still there, delete it so your Mac no longer trusts it.
Where OrbStack fits
OrbStack suits someone who wants Docker on a Mac with an app window, readable addresses for each project, and no account, and who uses it for personal projects. For paid work, check the license first. A small company may pay nothing for Docker Desktop, and Colima and Podman cost nothing at any size.
Apple also makes its own free tool, called container, that runs Linux containers from Terminal, each in its own small virtual machine. For throwaway macOS and Linux virtual machines, see Tart on a Mac. To run Windows 11 on a Mac, see UTM, Parallels Desktop, or VMware Fusion.


