OmaPhoto is a free photo editor with layers, built for Linux and Omarchy. It is a port of Compositor, a Mac app from Wonder Assembly, and it is MIT-licensed. The developer is @ZacharyZhang on X and ZacharyZhang-NY on GitHub, and the first release came out on September 26, 2026. OmaPhoto opens camera RAW files, and its Remove Background filter runs on your own computer, with a model that comes in the package.
This guide has every step from our OmaPhoto video, with the exact settings. We installed OmaPhoto, brightened a RAW photo of two lorikeets in the Camera Raw Filter, exported it as a JPEG, then cut a dog out of a lawn photo and saved it as a PNG with a see-through background. Everything below was done on Omarchy 4.0.4 with OmaPhoto 1.3.3.
What you need
You need a working Omarchy install on an x86_64 PC; the OmaPhoto packages are built for x86_64 only. Omarchy uses the Super key for most shortcuts, and on a PC keyboard that is the Windows key. If the Omarchy shortcuts are new to you, our list of Omarchy shortcuts to learn first covers the terminal, the menu, and closing windows.
To follow along with the same photos, both samples are free to use (CC0). The RAW file is a Nikon D5000 NEF of two rainbow lorikeets from raw.pixls.us (12.5 megapixels, about 10 MB). The dog is a photo by Joselodos on Wikimedia Commons; the original is 12000 x 8000 pixels, and we scaled our copy down to 4000 pixels wide. Put both in your Pictures folder.
Install OmaPhoto with one command
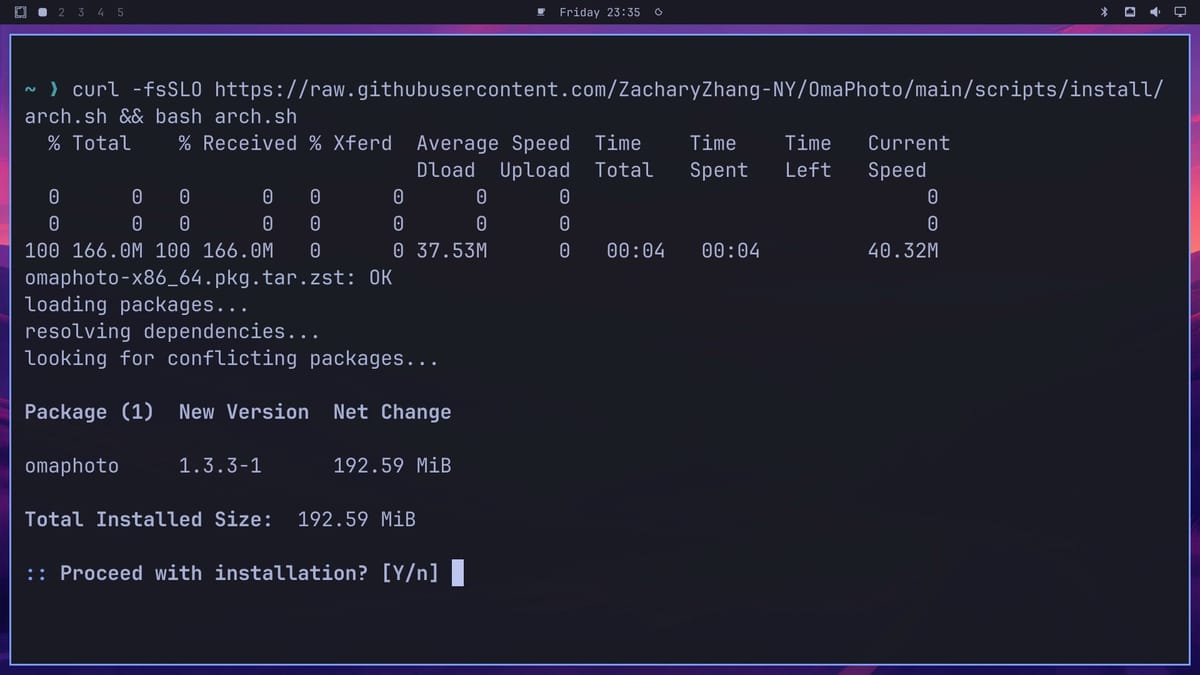
Press super enter to open a terminal. Copy this command from the OmaPhoto README, paste it into the terminal with super v , and press enter :
curl -fsSLO https://raw.githubusercontent.com/ZacharyZhang-NY/OmaPhoto/main/scripts/install/arch.sh && bash arch.shThe script downloads the newest OmaPhoto release from GitHub and checks it against the checksum file published with that release. It then hands the package to pacman. sudo may ask for your password first. pacman shows a table with the version and size and asks you to confirm. Ours read omaphoto 1.3.3-1 at 192.59 MiB. Press enter at the prompt, and the install finishes in a few seconds.
Most of that 192 MiB is the background removal model (168 MB) and the ONNX Runtime library that runs it. Because both ship in the package, Remove Background works the first time you use it, with nothing more to download. On our machine, every library OmaPhoto needs was already on a stock Omarchy install, so pacman added only OmaPhoto itself.
The command saves arch.sh in the folder you ran it from, so you can delete that file afterwards. Close the terminal with super w .
Start OmaPhoto from the Omarchy menu
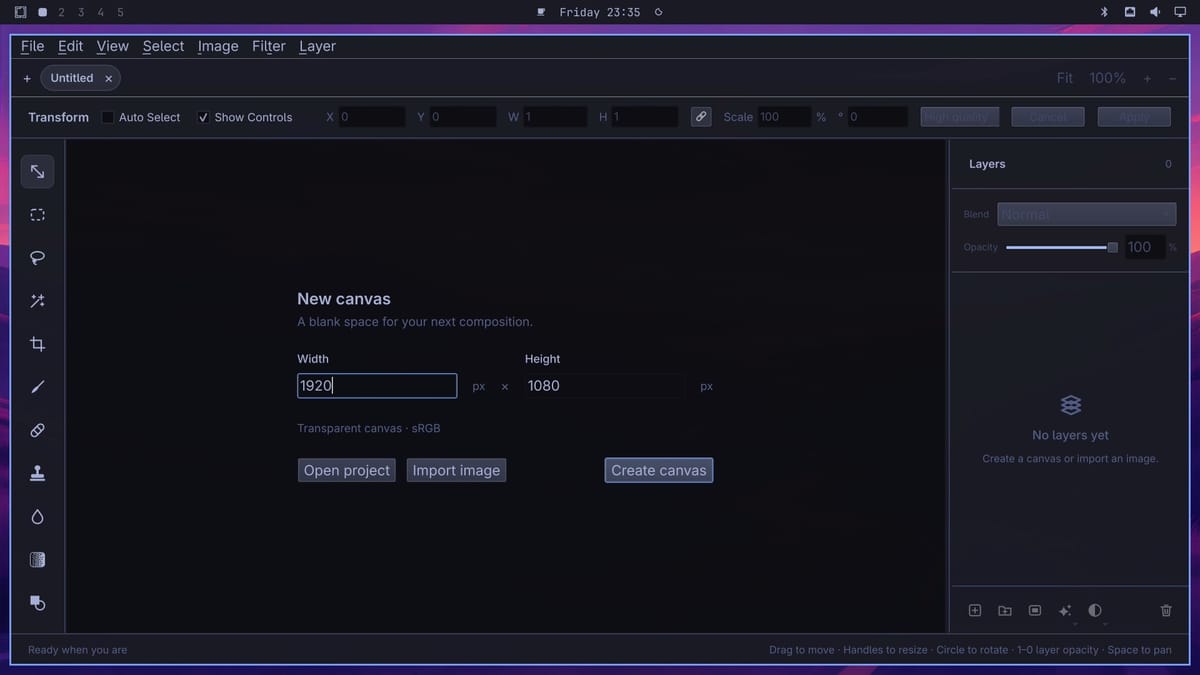
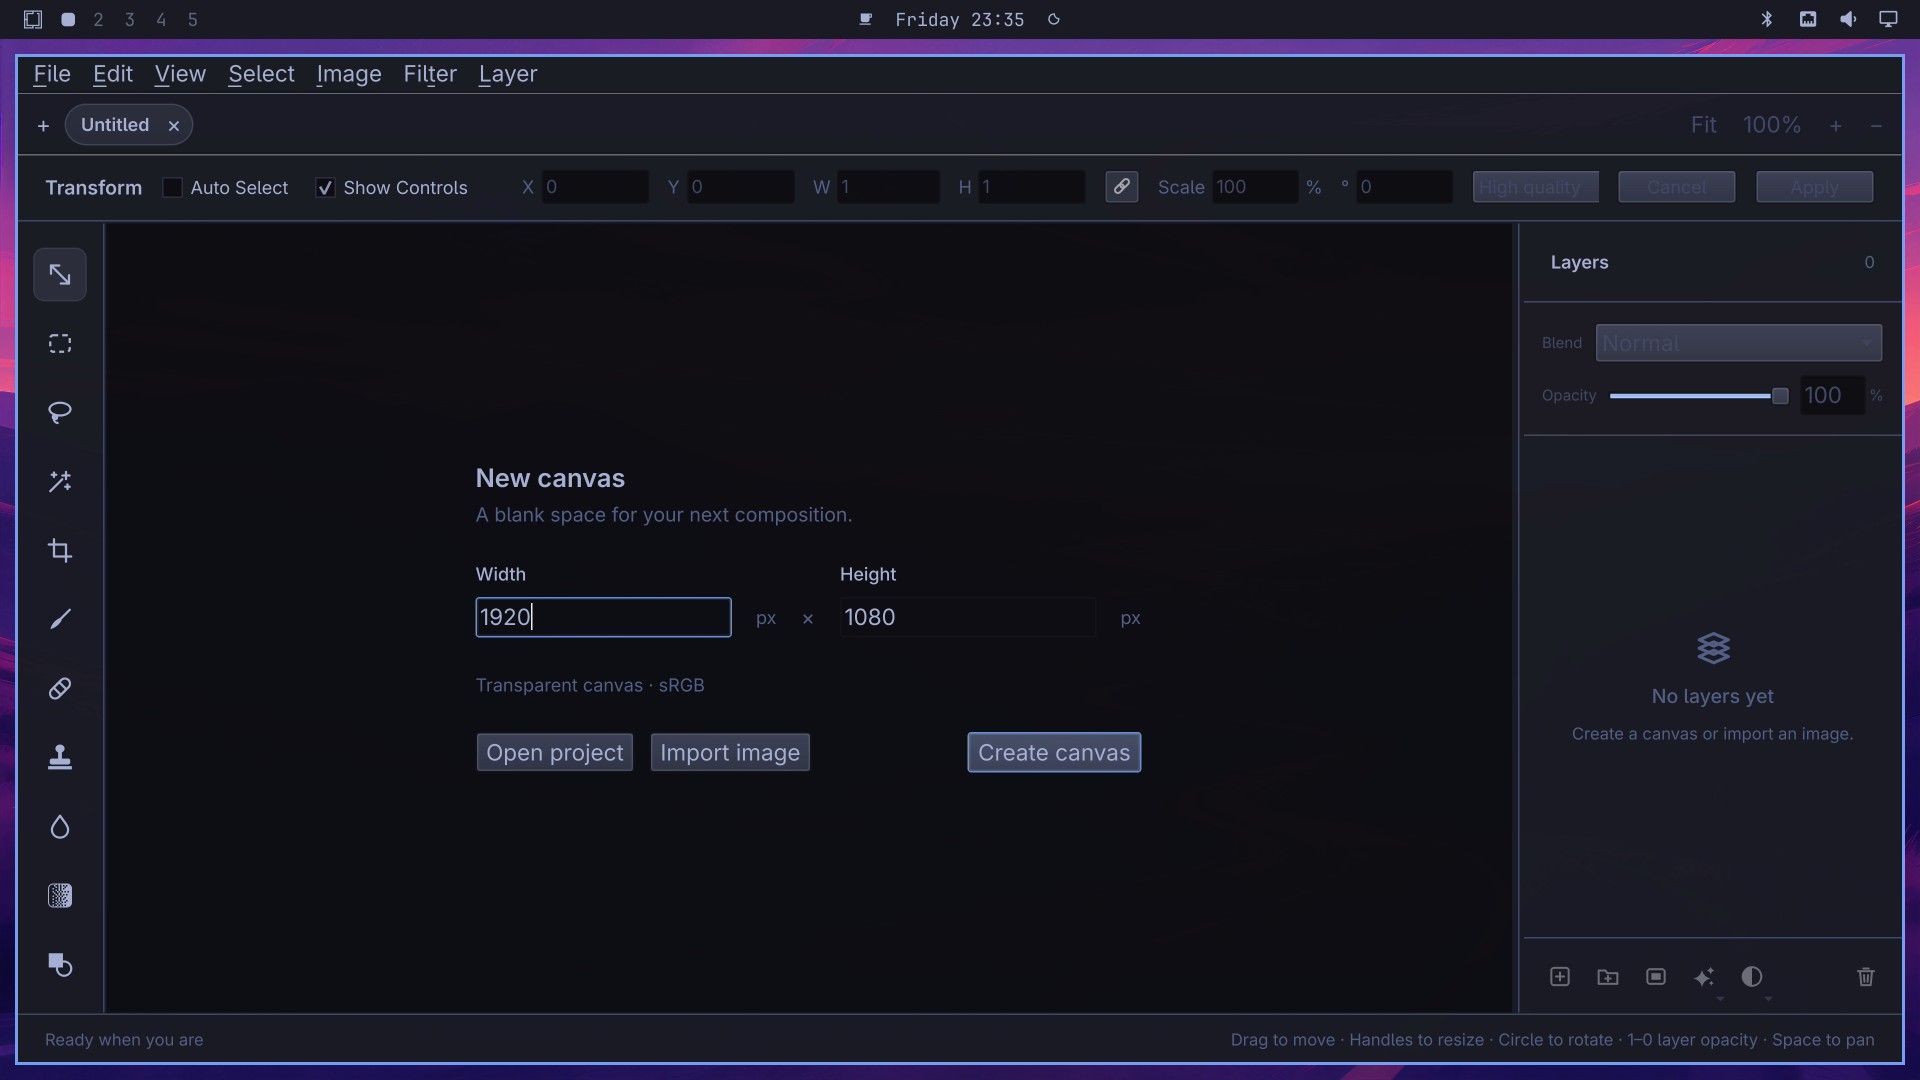
Press super space to open the Omarchy menu, type omaphoto, and press enter . OmaPhoto opens on a “New canvas” panel with three buttons: Open project, Import image, and Create canvas. Its colors come from your Omarchy theme, which was Tokyo Night for us.
Open a RAW photo
Click Import image. In the file dialog, click Pictures on the left, click the RAW file (ours is lorikeets-d5000.nef), and click Open. The dialog shows a preview of the selected photo on the right, RAW files included. If the dialog does not list your RAW file, rename it so the extension is in lower case (.nef rather than .NEF).
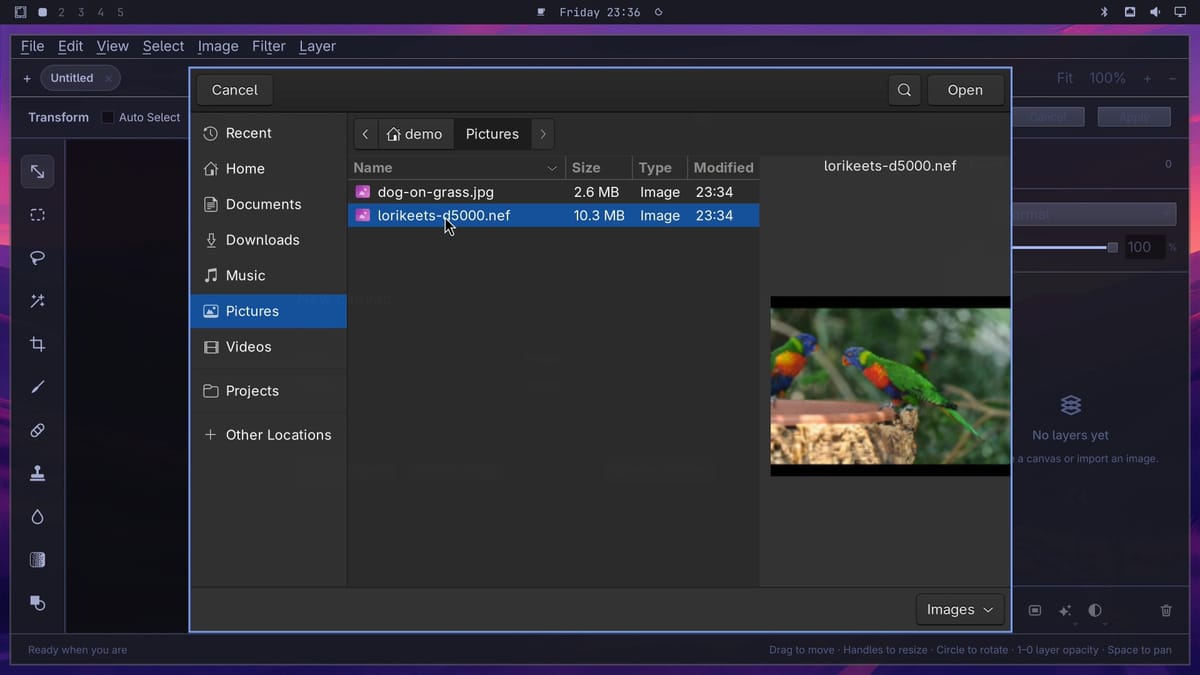
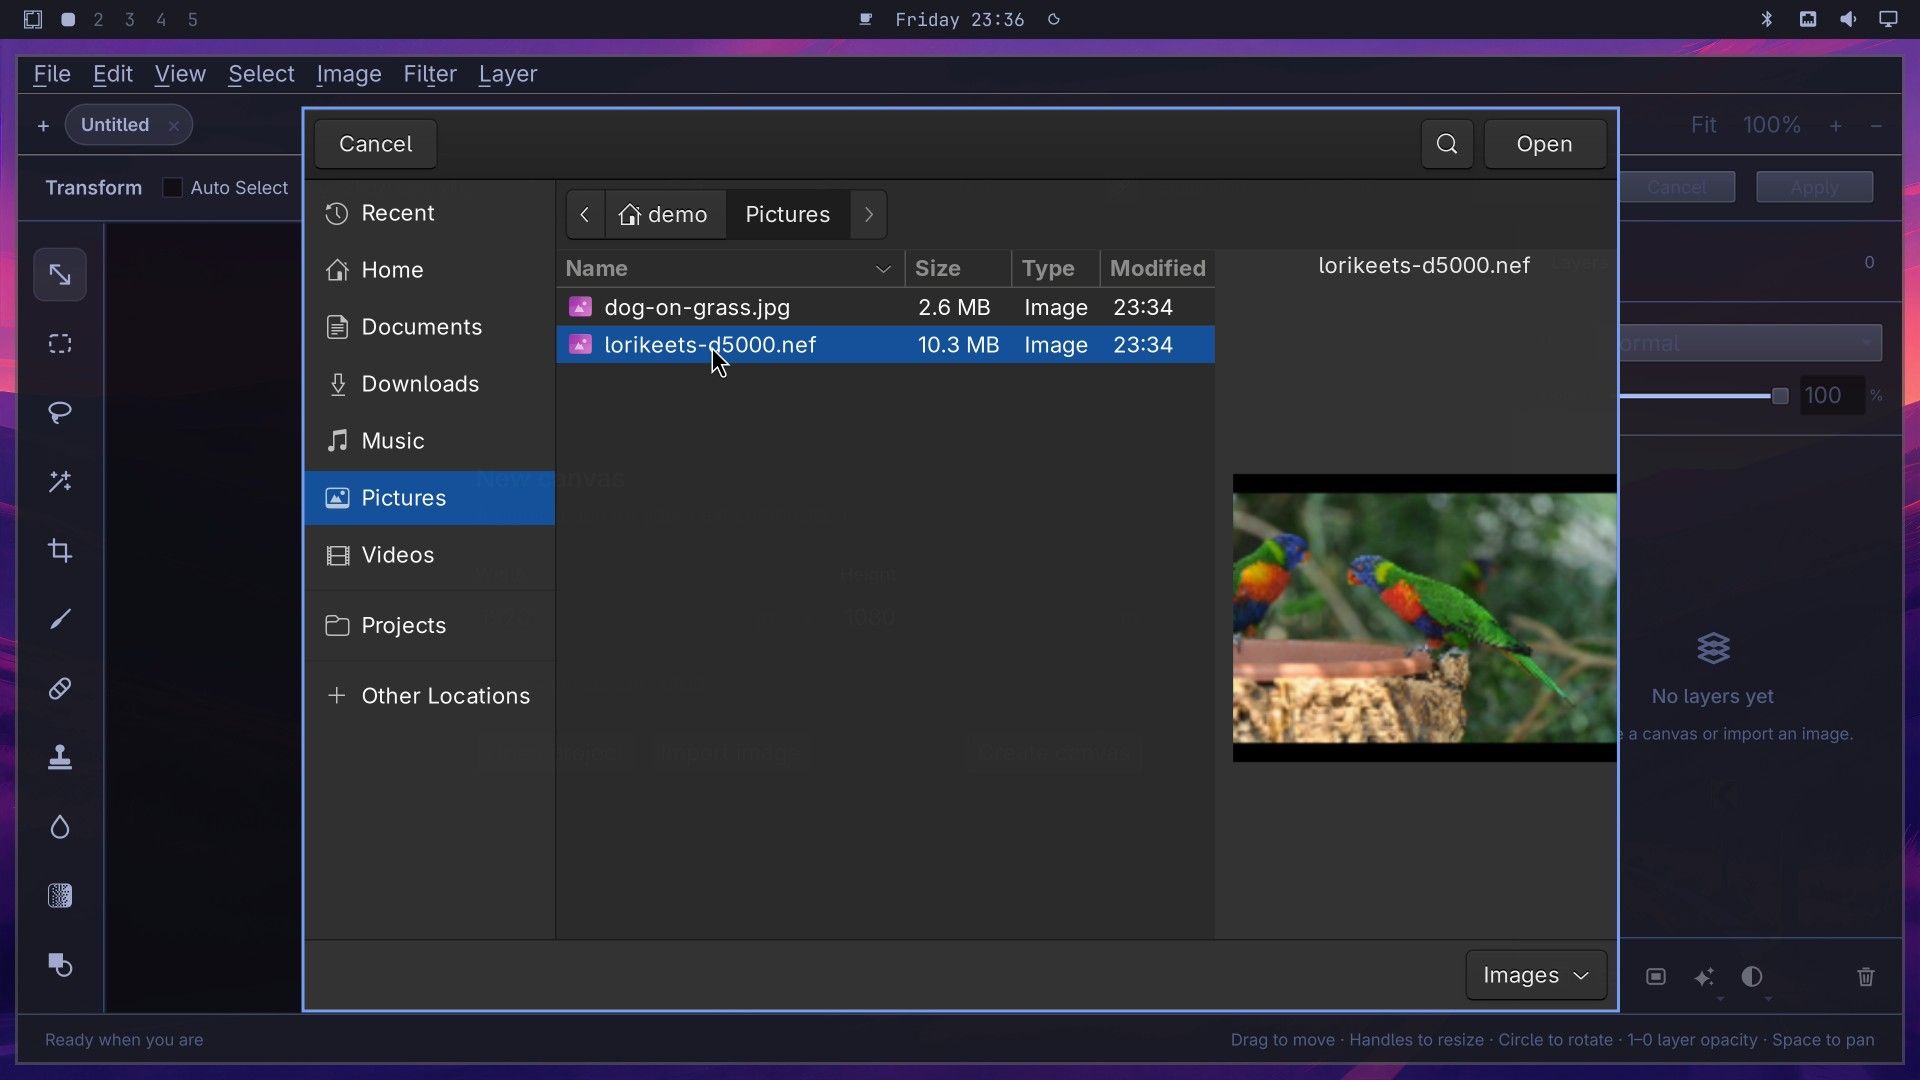
On a standard Omarchy install, this dialog does not float over the editor. To float it as in our screenshots, add this line to ~/.config/hypr/looknfeel.lua, then run hyprctl reload:
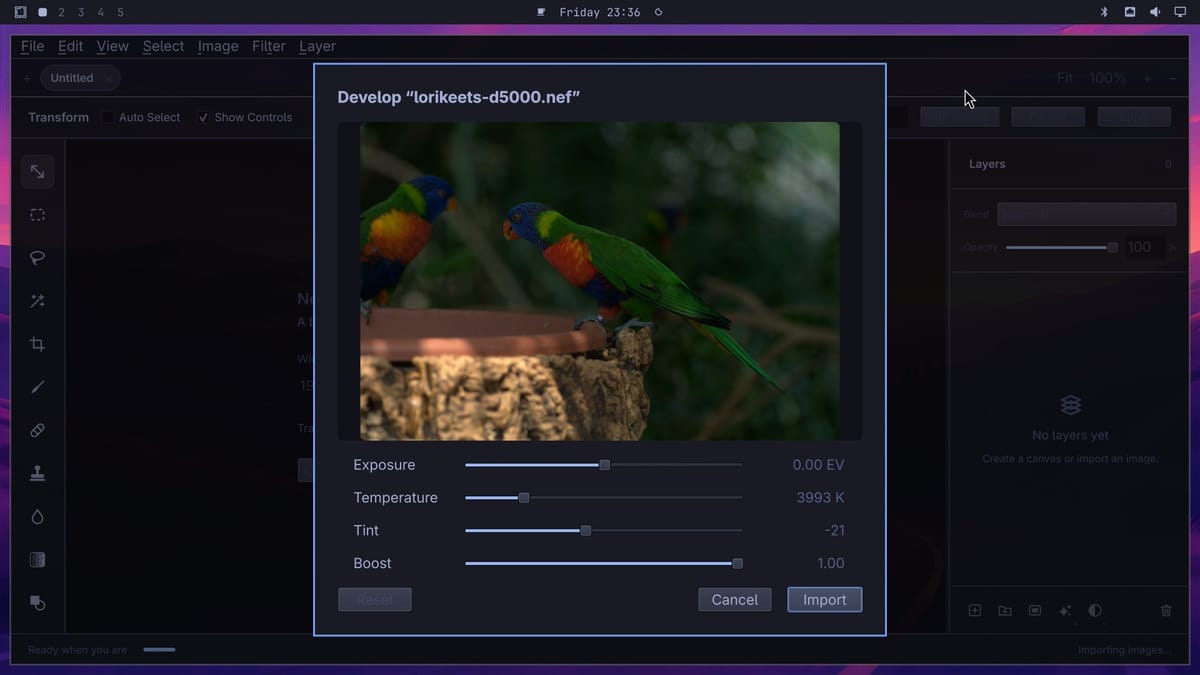
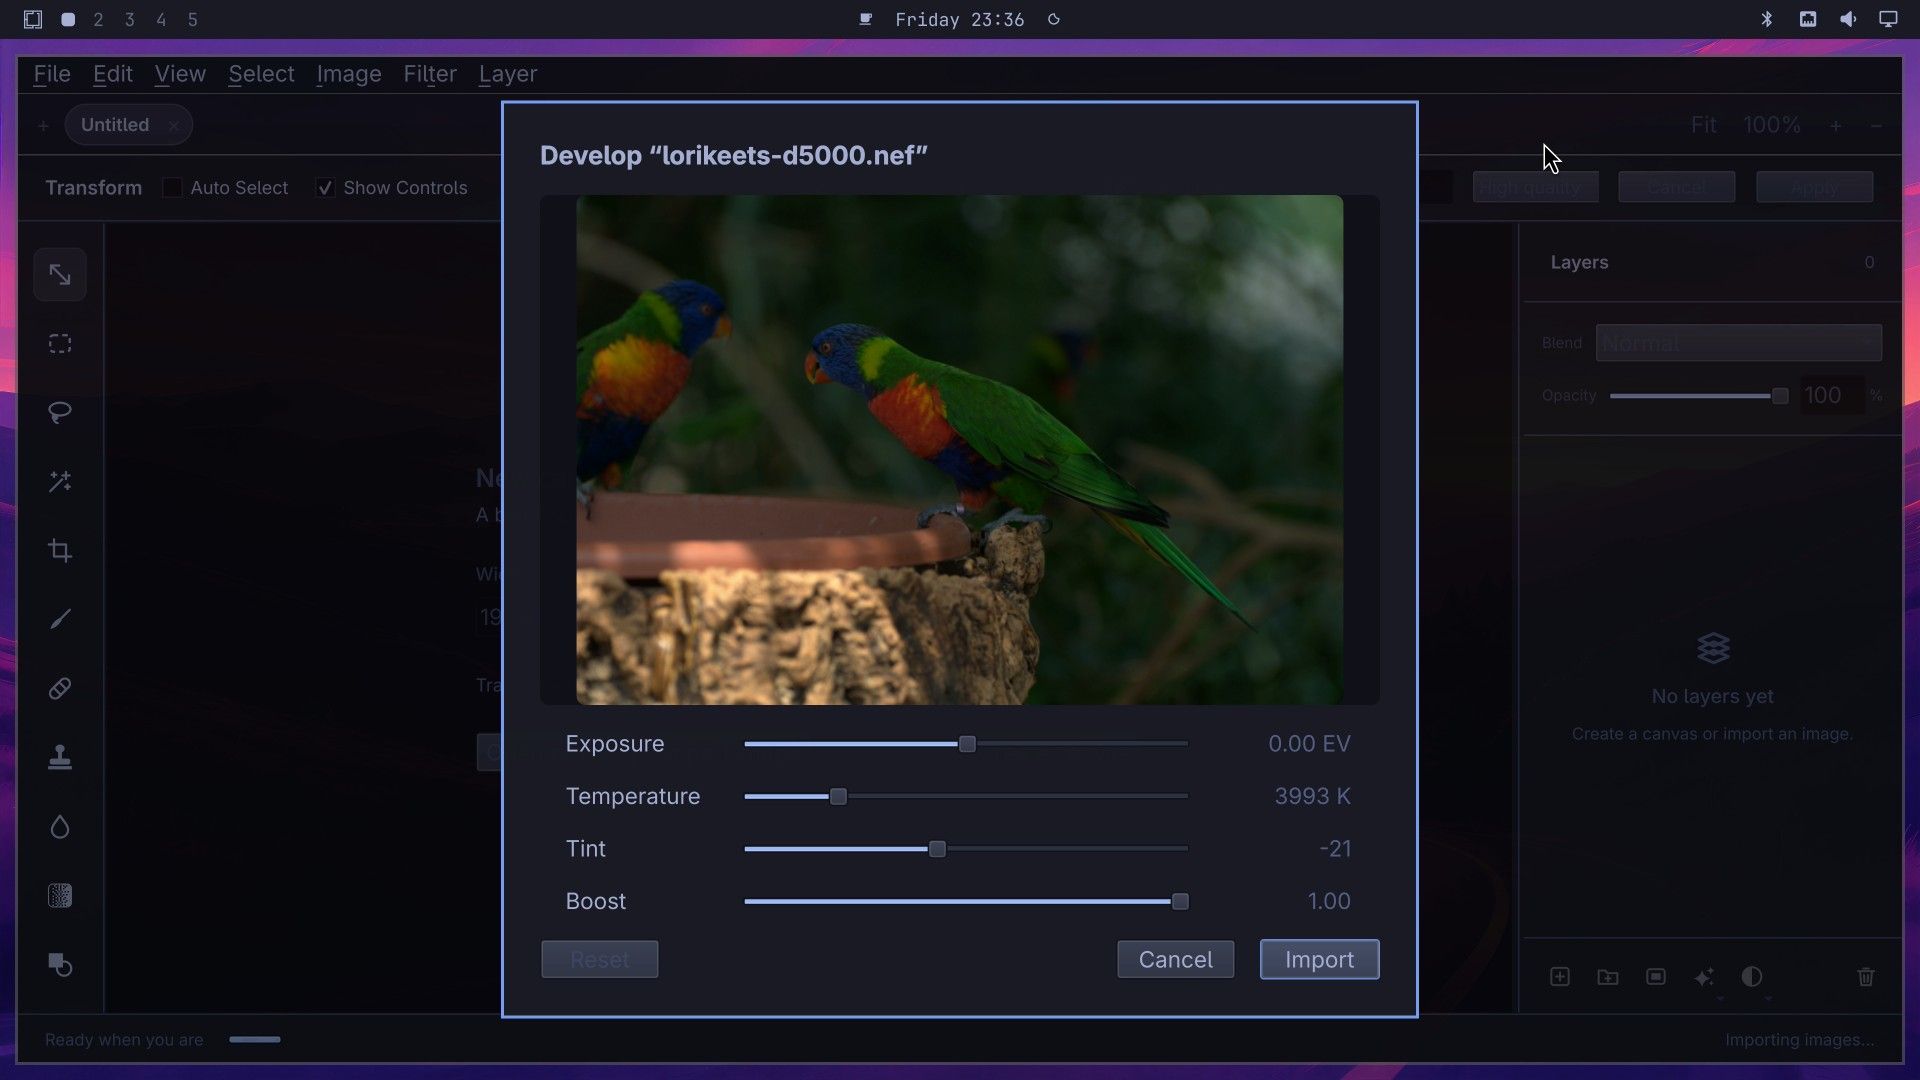
o.window({ class = "^omaphoto$" }, { tag = "+floating-window" })A RAW file opens in a Develop window first. It has sliders for Exposure, Temperature, Tint, and Boost, and it starts from the white balance the camera recorded (3993 K and a tint of -21 for our photo). We kept the defaults and pressed enter to import, because the Camera Raw Filter gives you more controls once the photo is on the canvas. The photo then lands on the canvas as a layer, which the Layers panel lists as lorikeets-d5000, 4310 x 2868 pixels.
Brighten the photo in the Camera Raw Filter
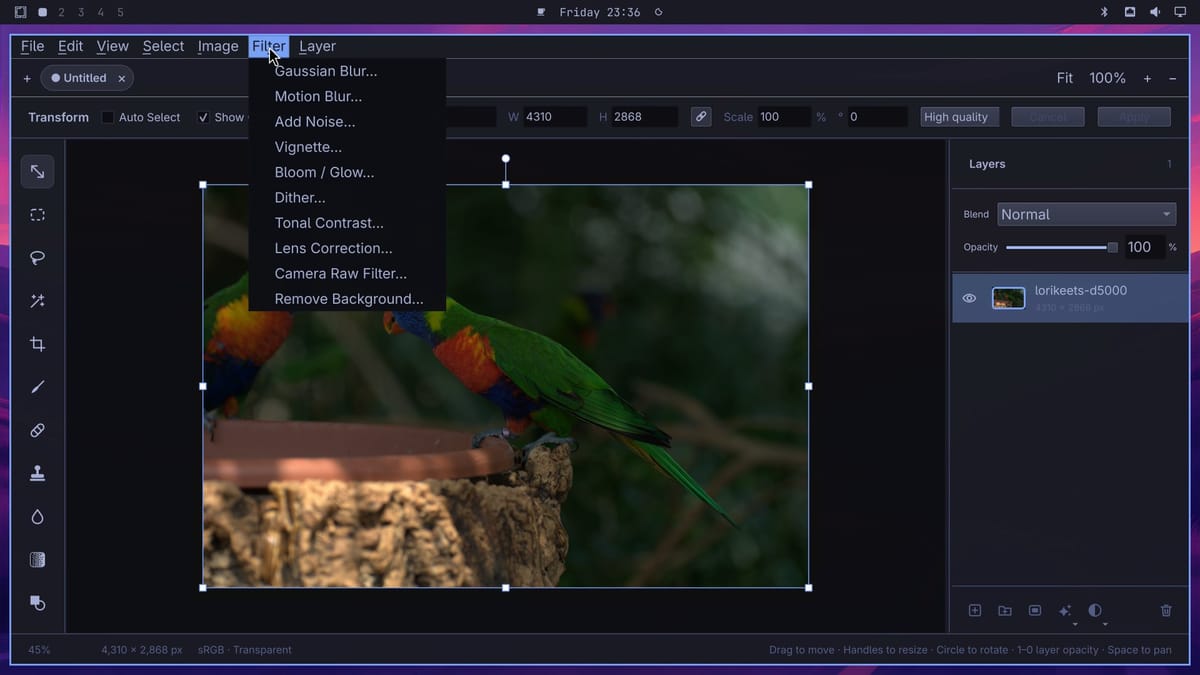
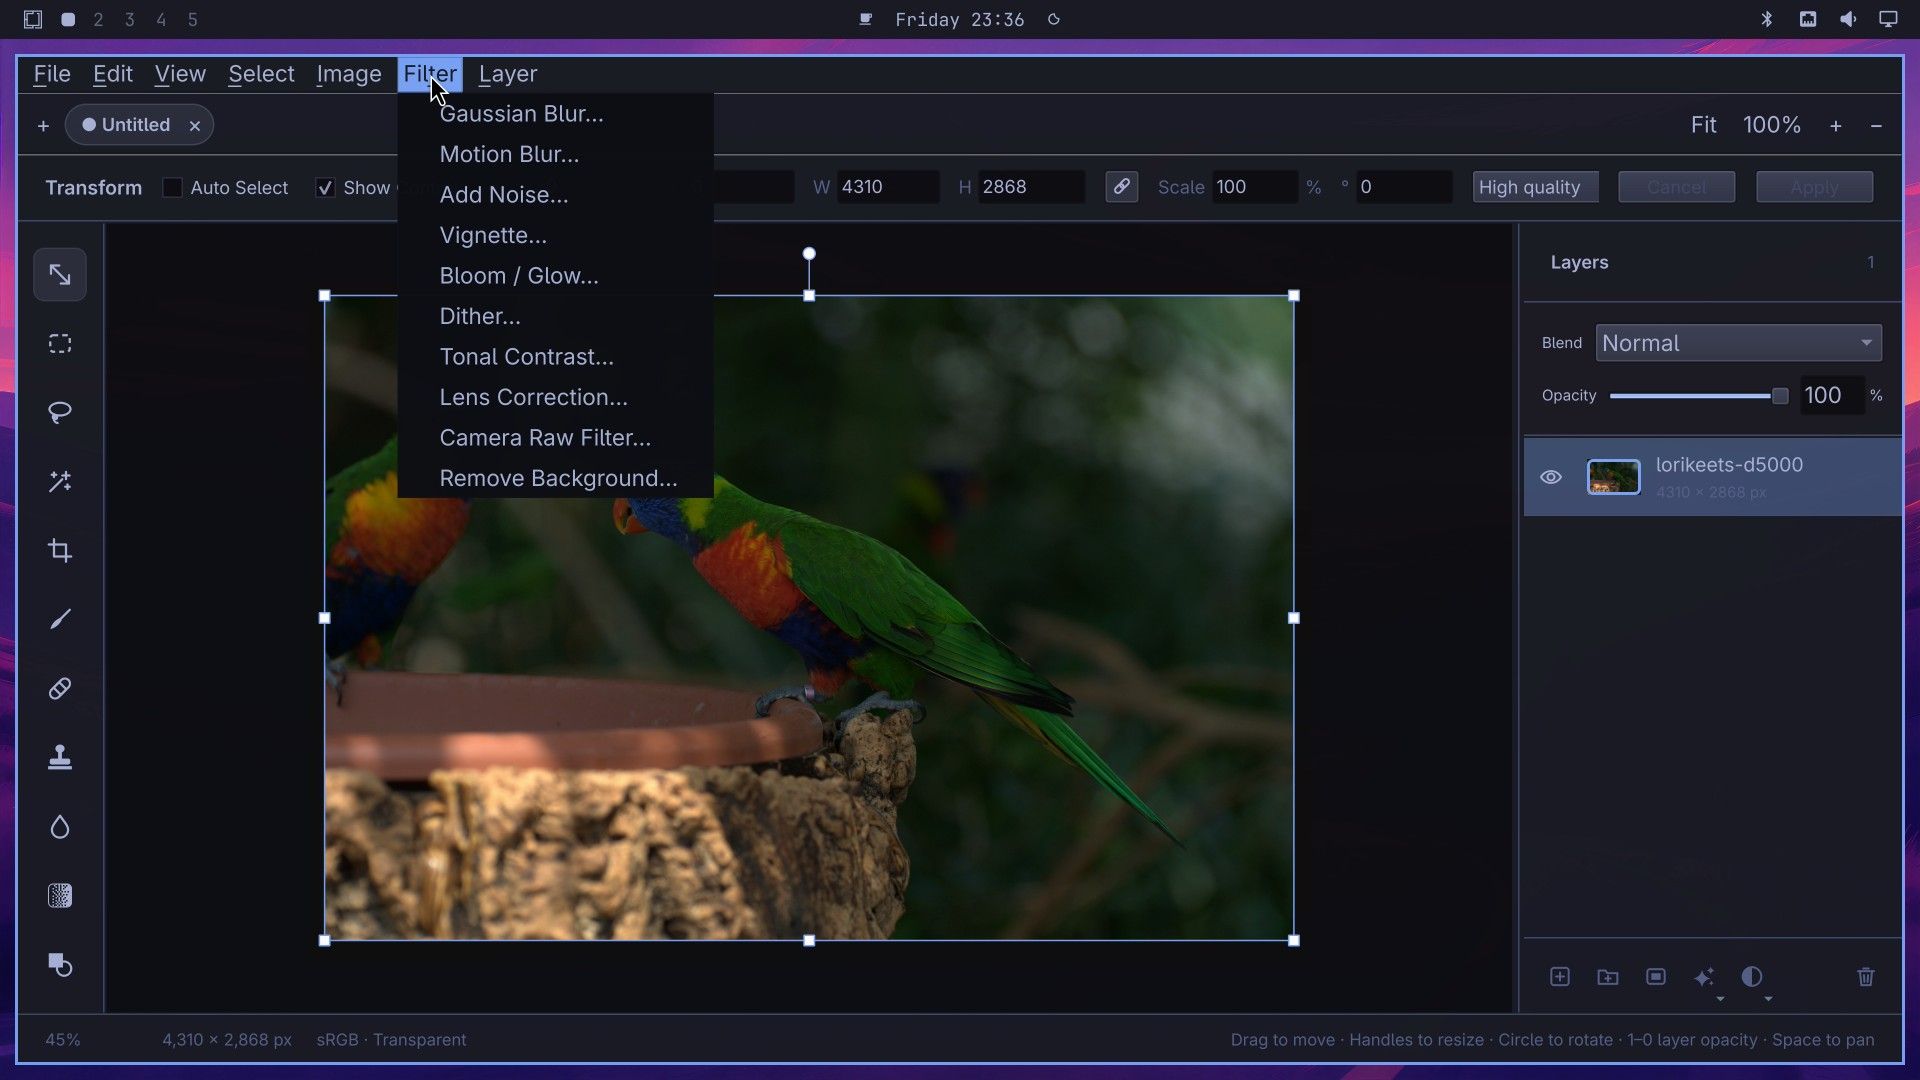
Our lorikeets came out a little dark. Open the Filter menu and choose Camera Raw Filter, the second item from the bottom.
The filter docks on the right side of the window, with a histogram at the top and the sliders in groups below it. The first group, Light, holds Exposure, Contrast, Highlights, Shadows, Whites, and Blacks. We dragged Exposure slowly to the right, to about +1, and gave Shadows a small drag to 19, which lifted the dark leaves behind the birds.
Clicking the Light heading folds that group, and the Color group moves up into view. We dragged Vibrance to about 25, which brings up the color in the feathers without pushing the already bright reds too far.
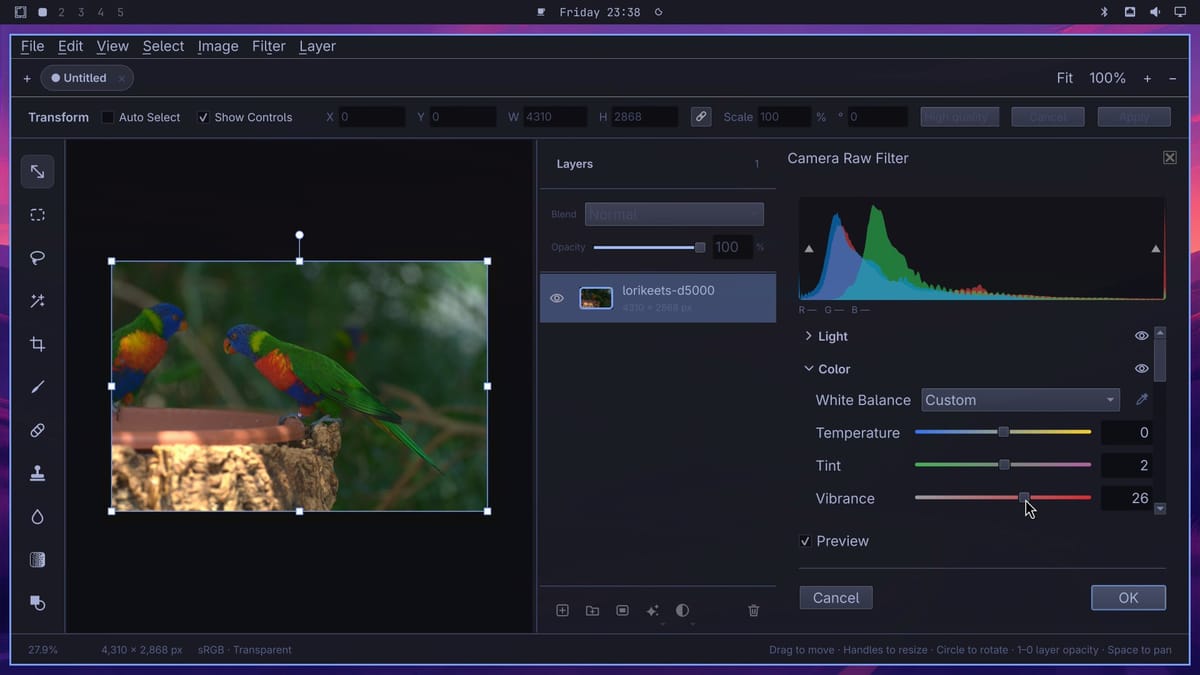
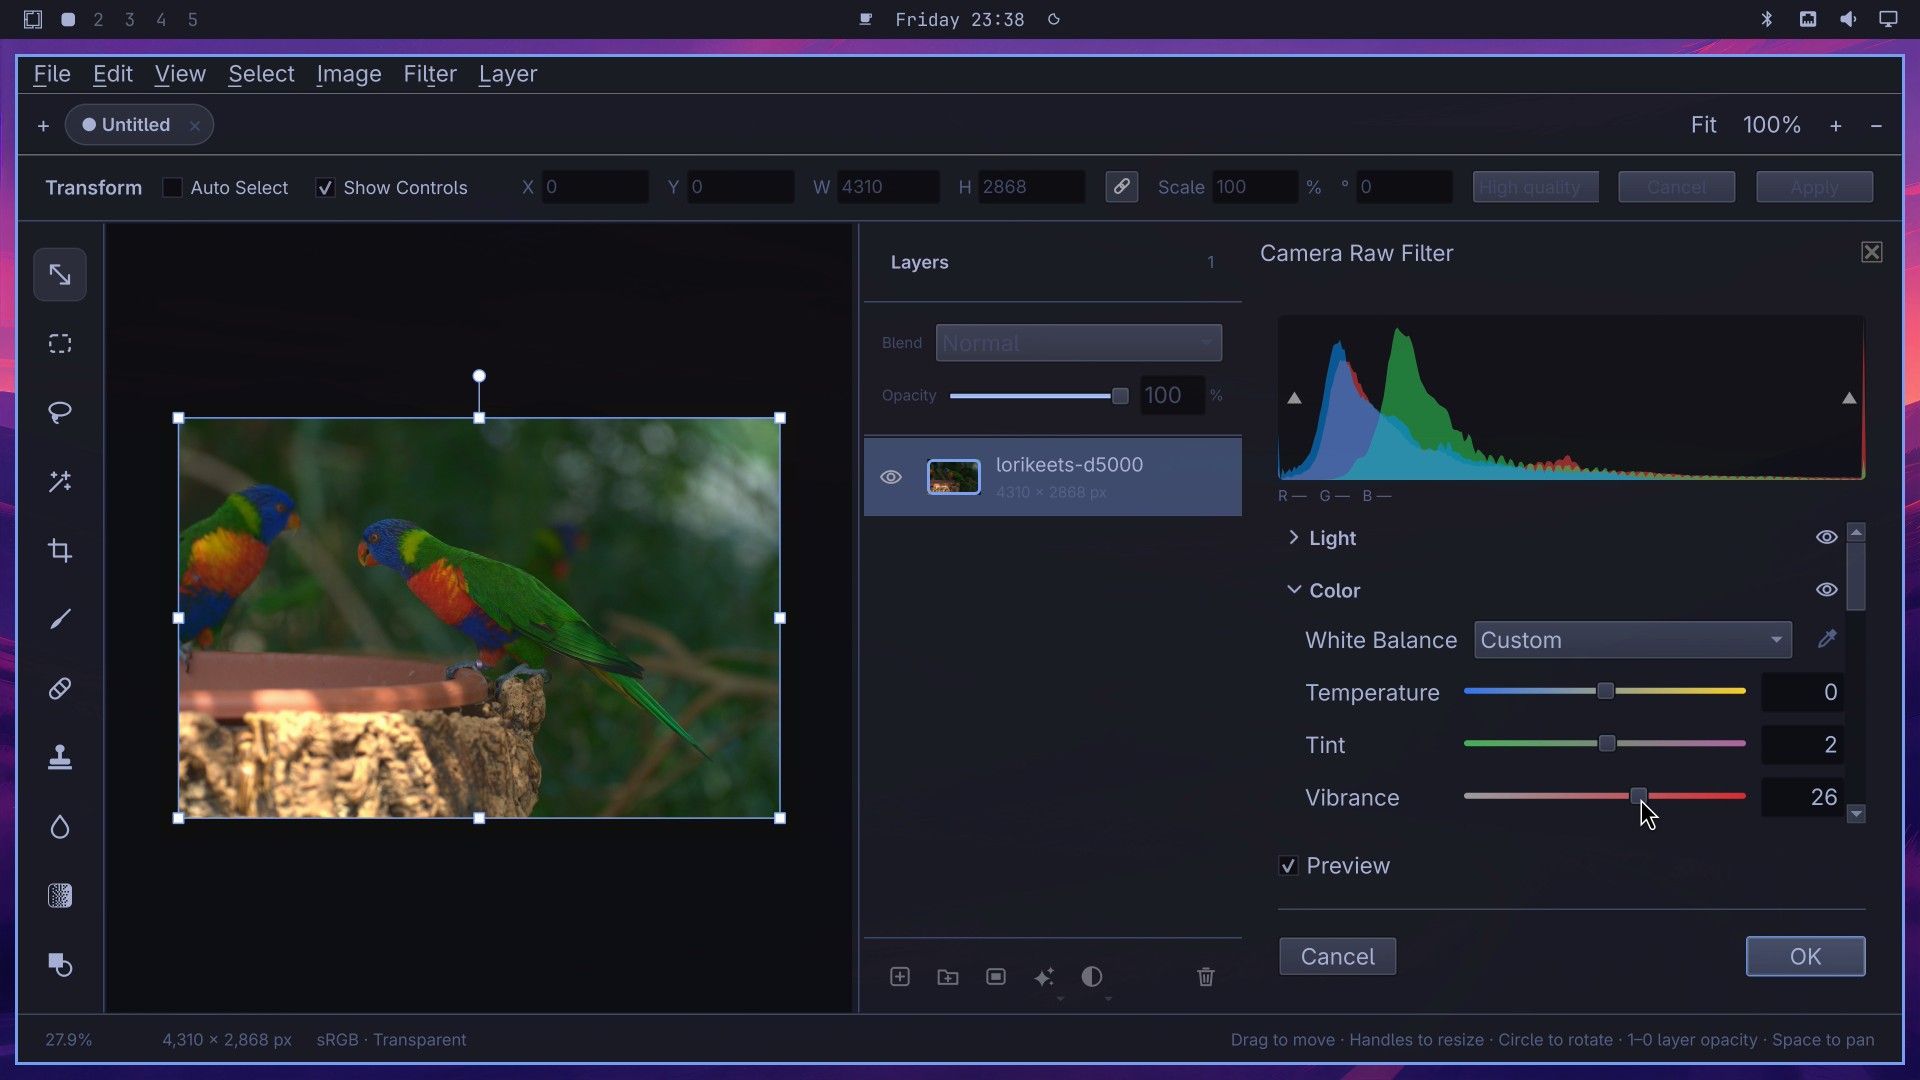
Drag slowly. On our Intel N100 mini PC (a GMKtec NucBox G2), the preview redrew a bit more often than once a second while a slider moved, and it caught up about a second and a half after the slider stopped. You can also type a number in the box at the right of each slider. Pressing enter in one of those boxes applies the whole filter, the same as clicking OK, so finish your other changes first.
Compare before and after with the eye icon
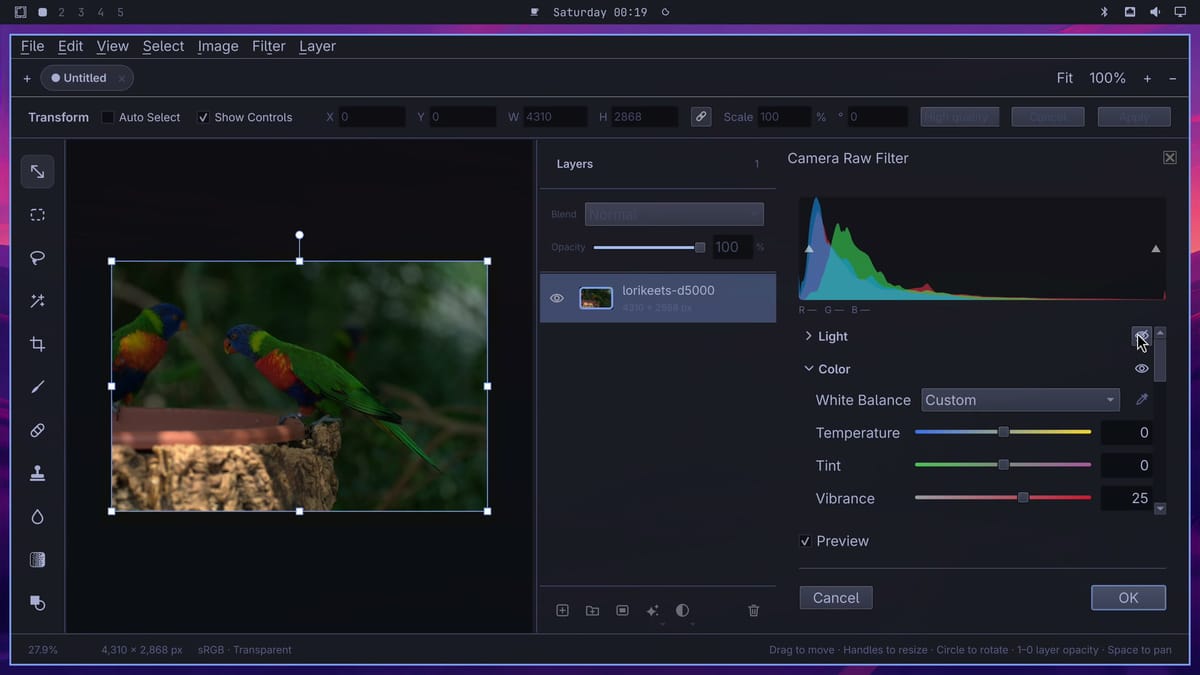
Once you change a group, an eye icon appears next to its heading. Click the eye next to Light, and the photo goes back to its dark look, with the Light edits hidden but still set. Click it again to bring them back.
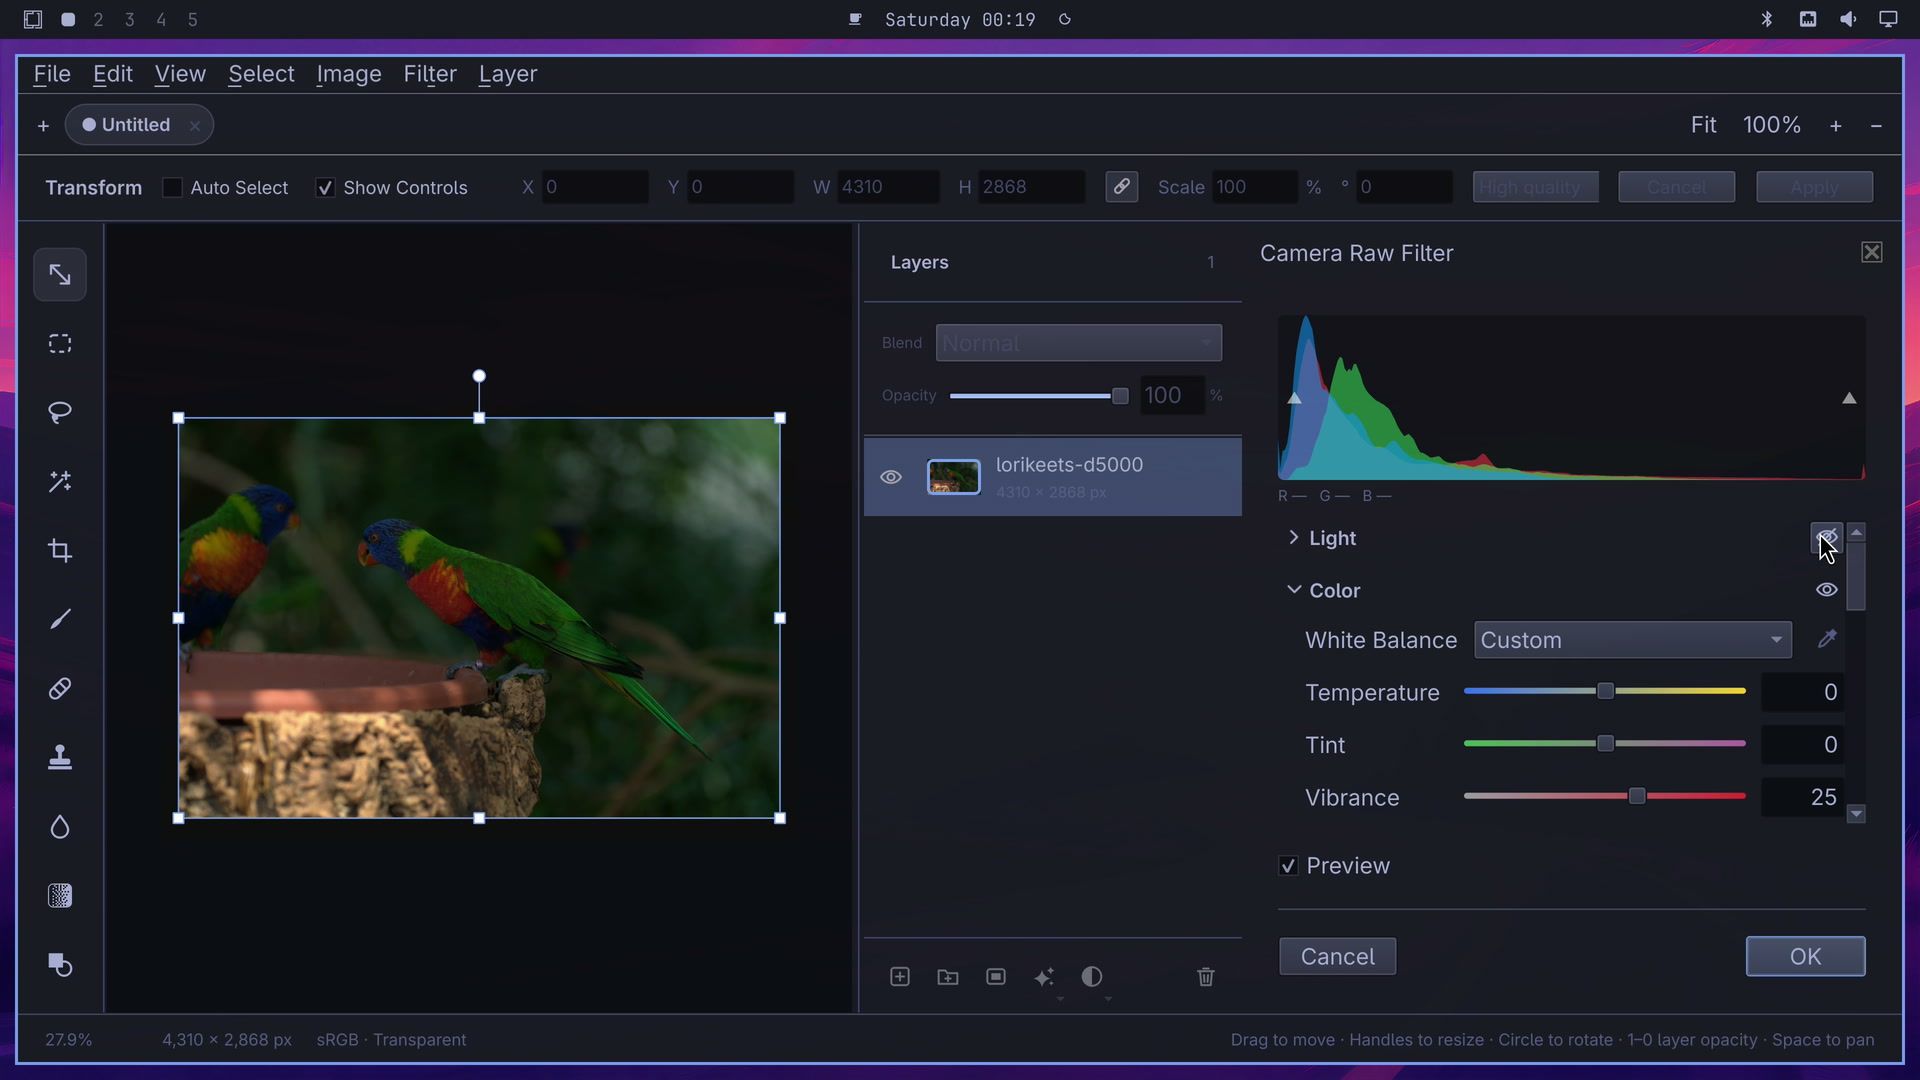
When the photo looks right, click OK. The button reads “Applying…” for a few seconds, then the panel closes and the edited photo fills the canvas again.
Export a JPEG
Press ctrl alt shift s to export a JPEG (it is also in the File menu as Export JPEG). The export sheet shows a preview, a Quality slider that starts at 85%, a swatch for the color that fills any see-through areas, and a size estimate. Our photo came to 1.1 MB at 85%.
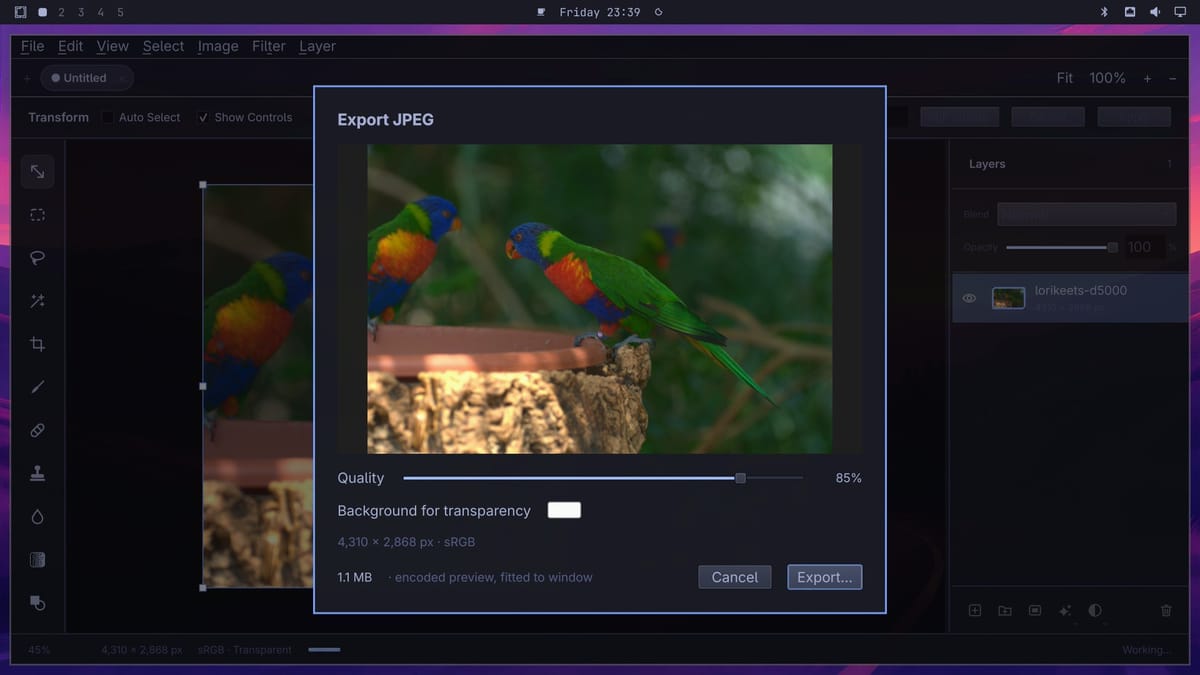
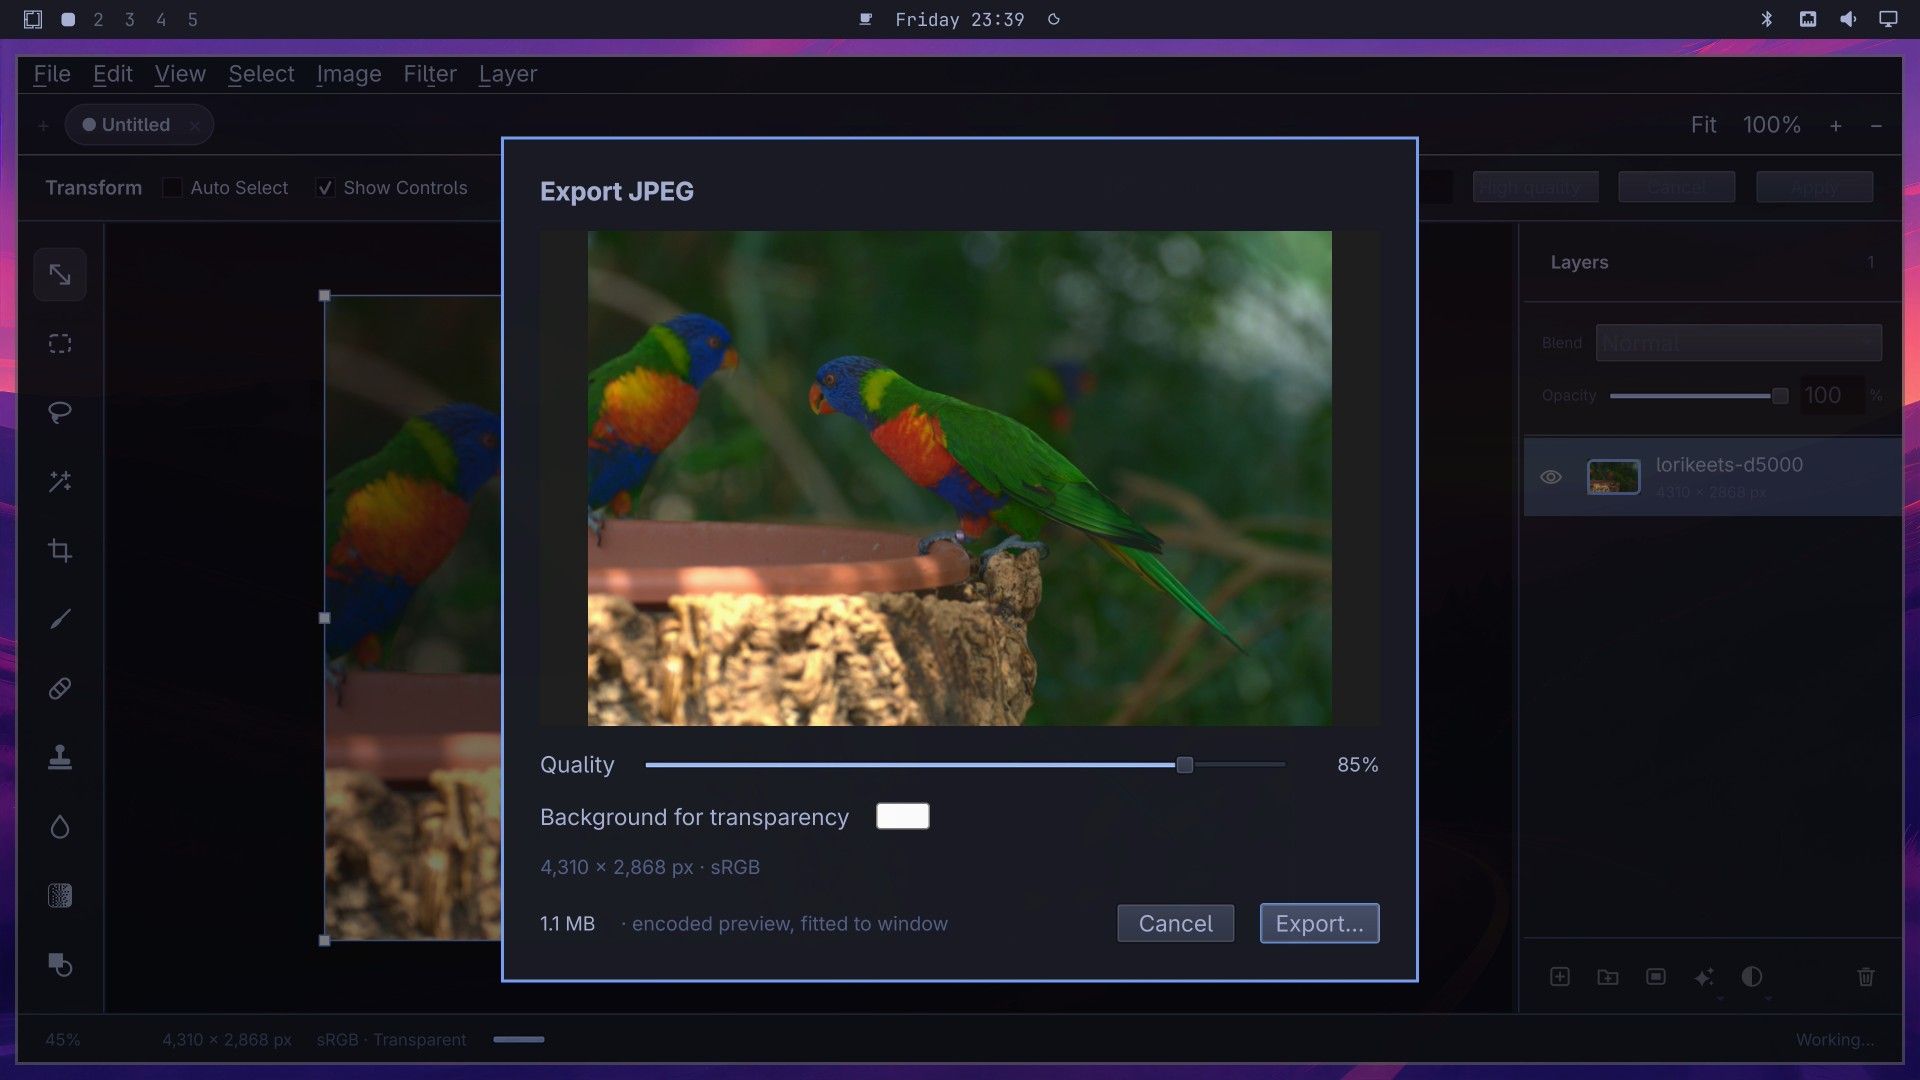
Click Export…, type a name (we used lorikeets-edit), and press enter . The file is written as soon as the dialog closes.
Remove a background
OmaPhoto works in tabs, one project per tab. Click the + button at the top left to open a new tab, click Import image, choose the dog photo, and click Open. A JPEG skips the Develop window and goes straight onto the canvas.
Open the Filter menu again and choose Remove Background, the last item. A dialog opens with Basic and Advanced modes, and the background disappears in the preview behind it. On our N100 that took under two seconds, including loading the model the first time. The Advanced mode adds controls to refine the edge, adjust its contrast, and shift it in or out.
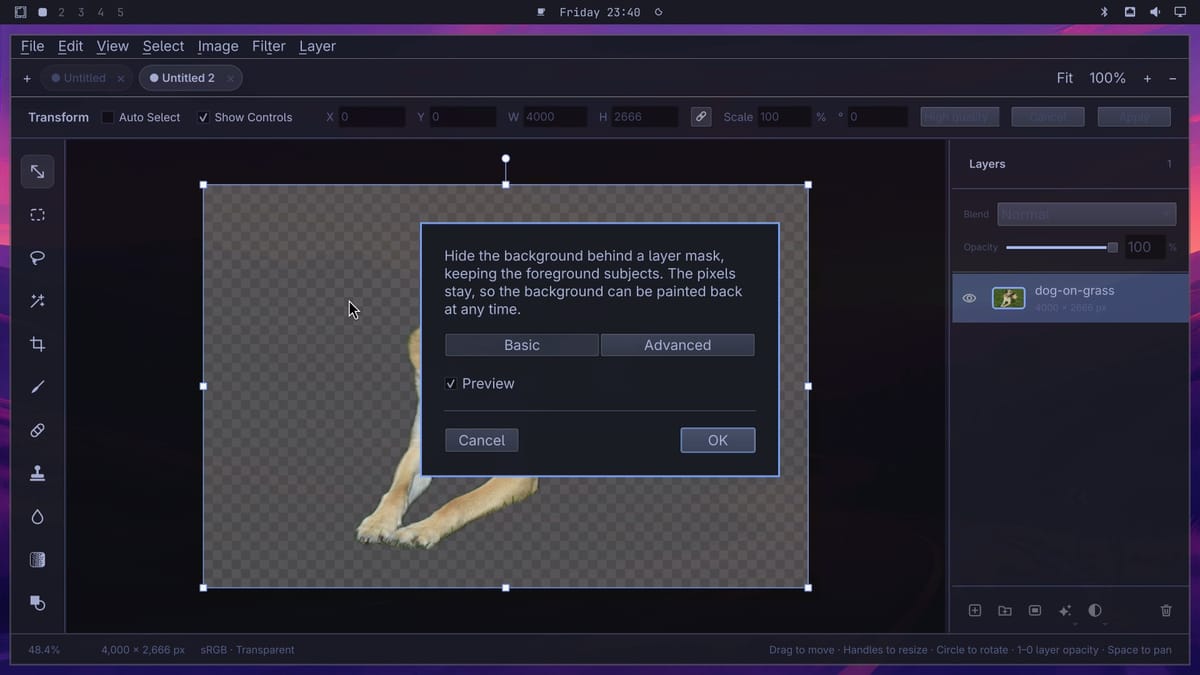
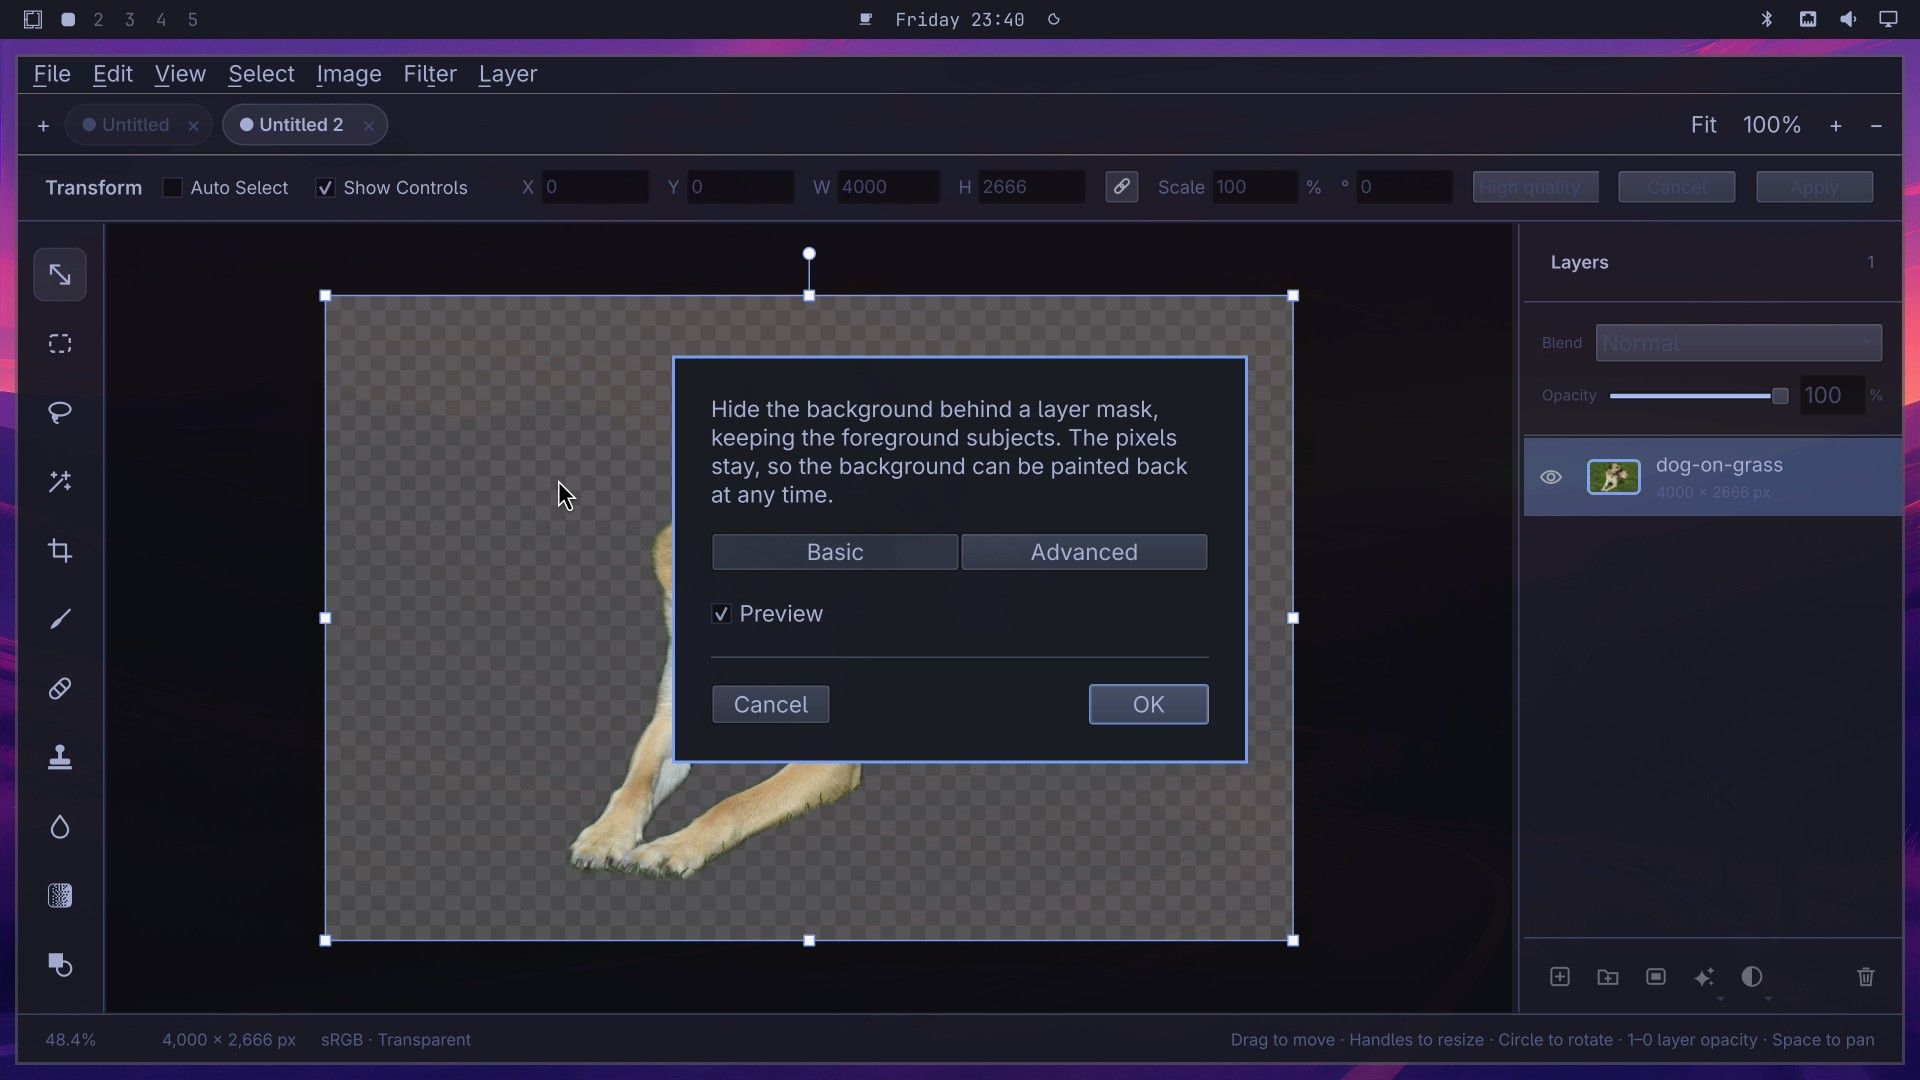
As the dialog says, the filter hides the background behind a layer mask instead of deleting it, so you can paint the background back or change the edge later. Click OK to keep the result.
Check the layer mask
In the Layers panel, a black-and-white mask thumbnail now sits next to the photo thumbnail. Right-click the mask and choose Disable Mask, and the grass comes back, with a red slash across the mask thumbnail. Right-click it again and choose Enable Mask to hide the grass once more. The same menu has Delete Mask and Unlink Mask.
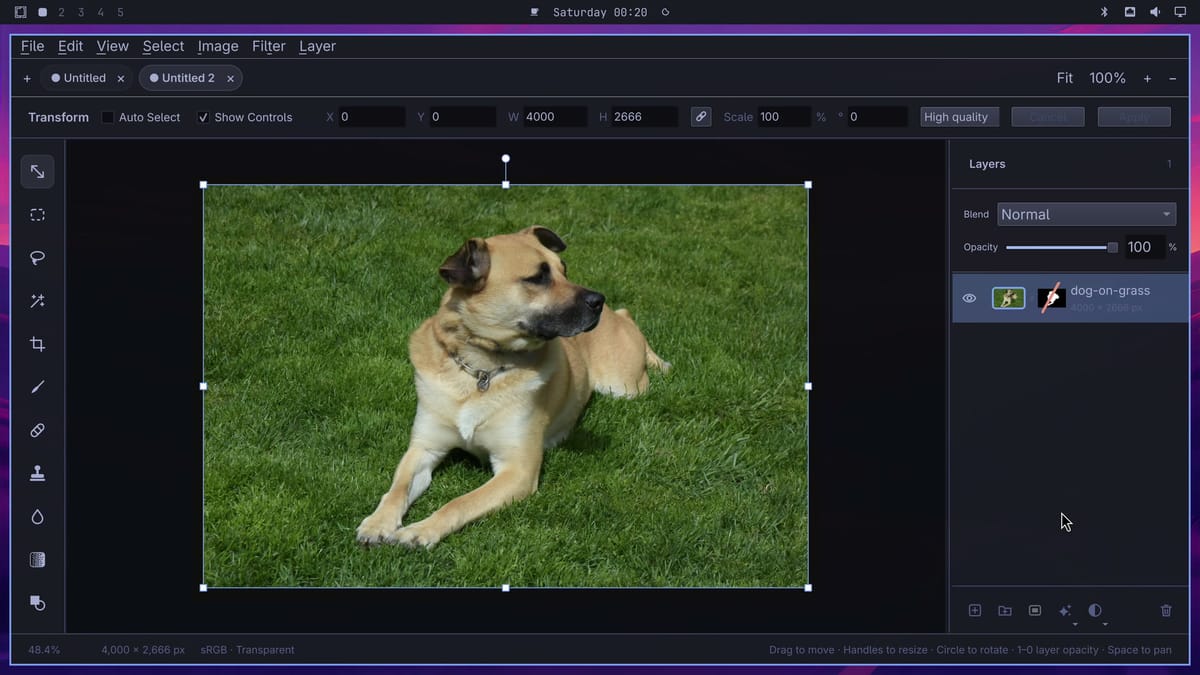
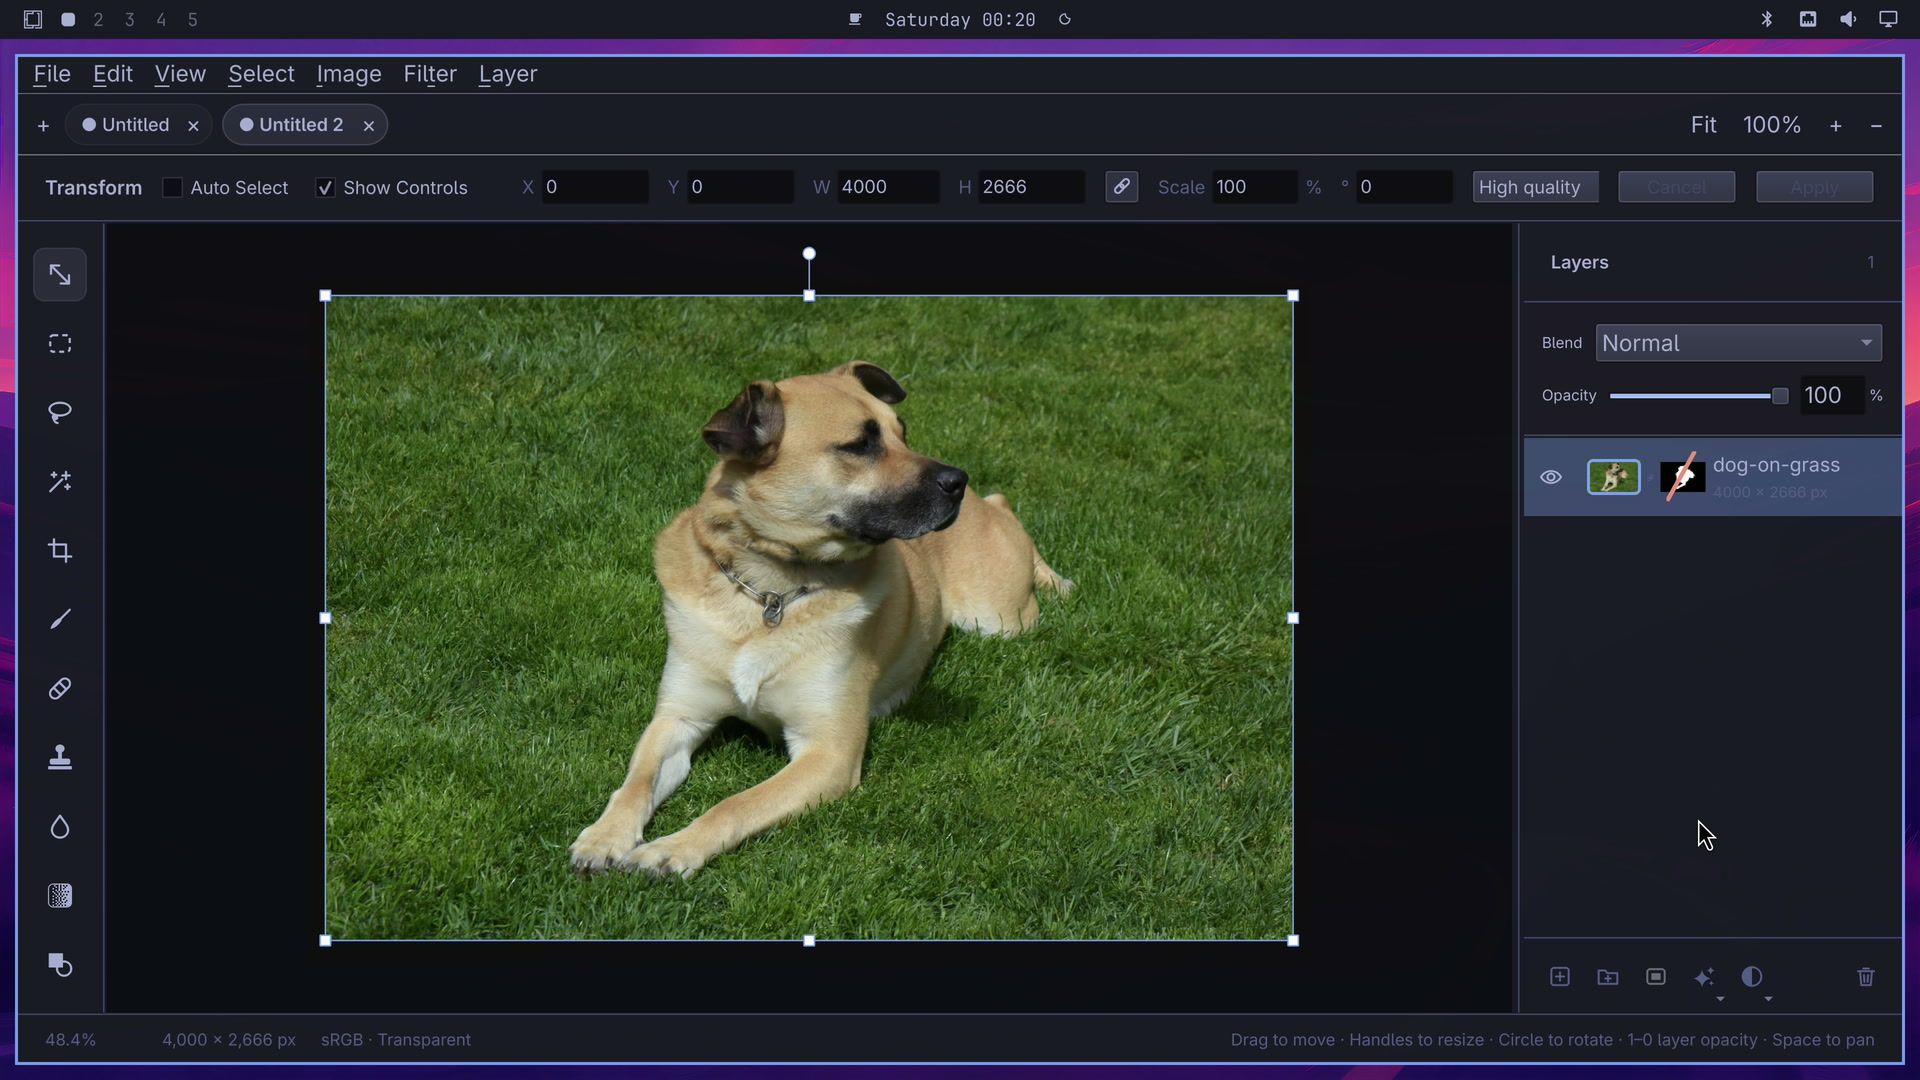
While the mask is selected, the Image menu items (Curves, Levels, Hue/Saturation, and the rest) are greyed out. Click the photo thumbnail in the Layers panel to use them again.
Export a PNG with a see-through background
Press ctrl shift e to export the cutout; a JPEG cannot store transparency, so this one is a PNG. The save dialog opens straight away, with no export sheet. Name the file (ours was dog-cutout) and press enter . The PNG keeps the full 4000 x 2666 size, with the background see-through.
OmaPhoto follows your Omarchy theme
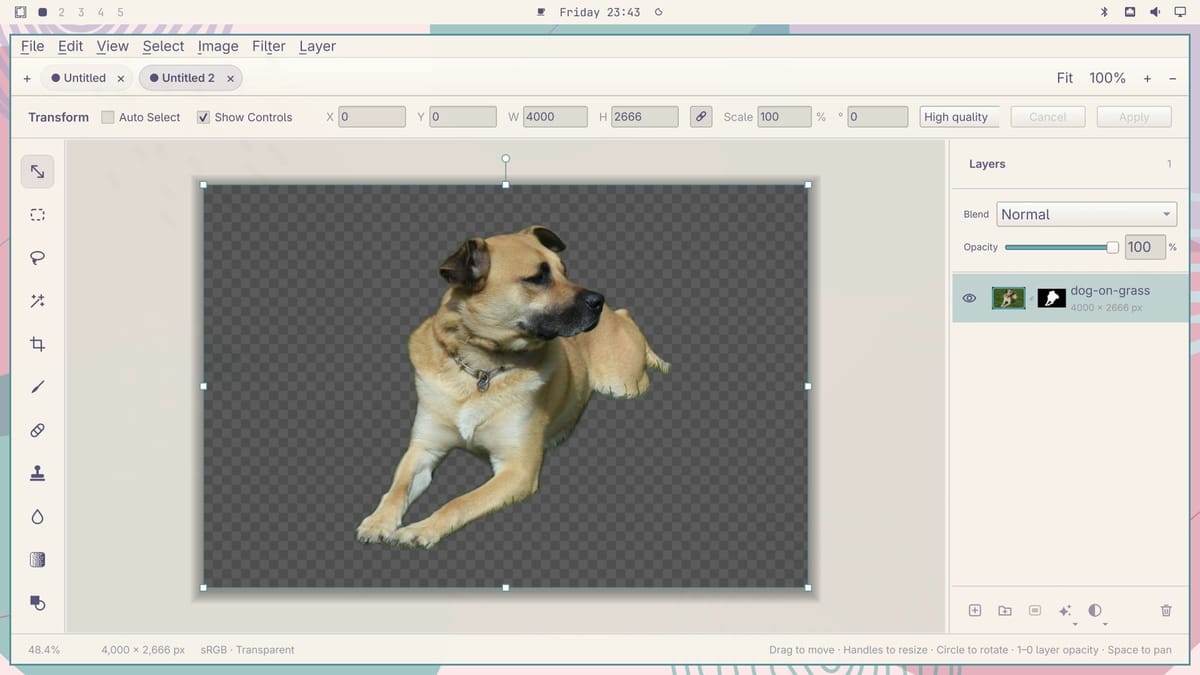
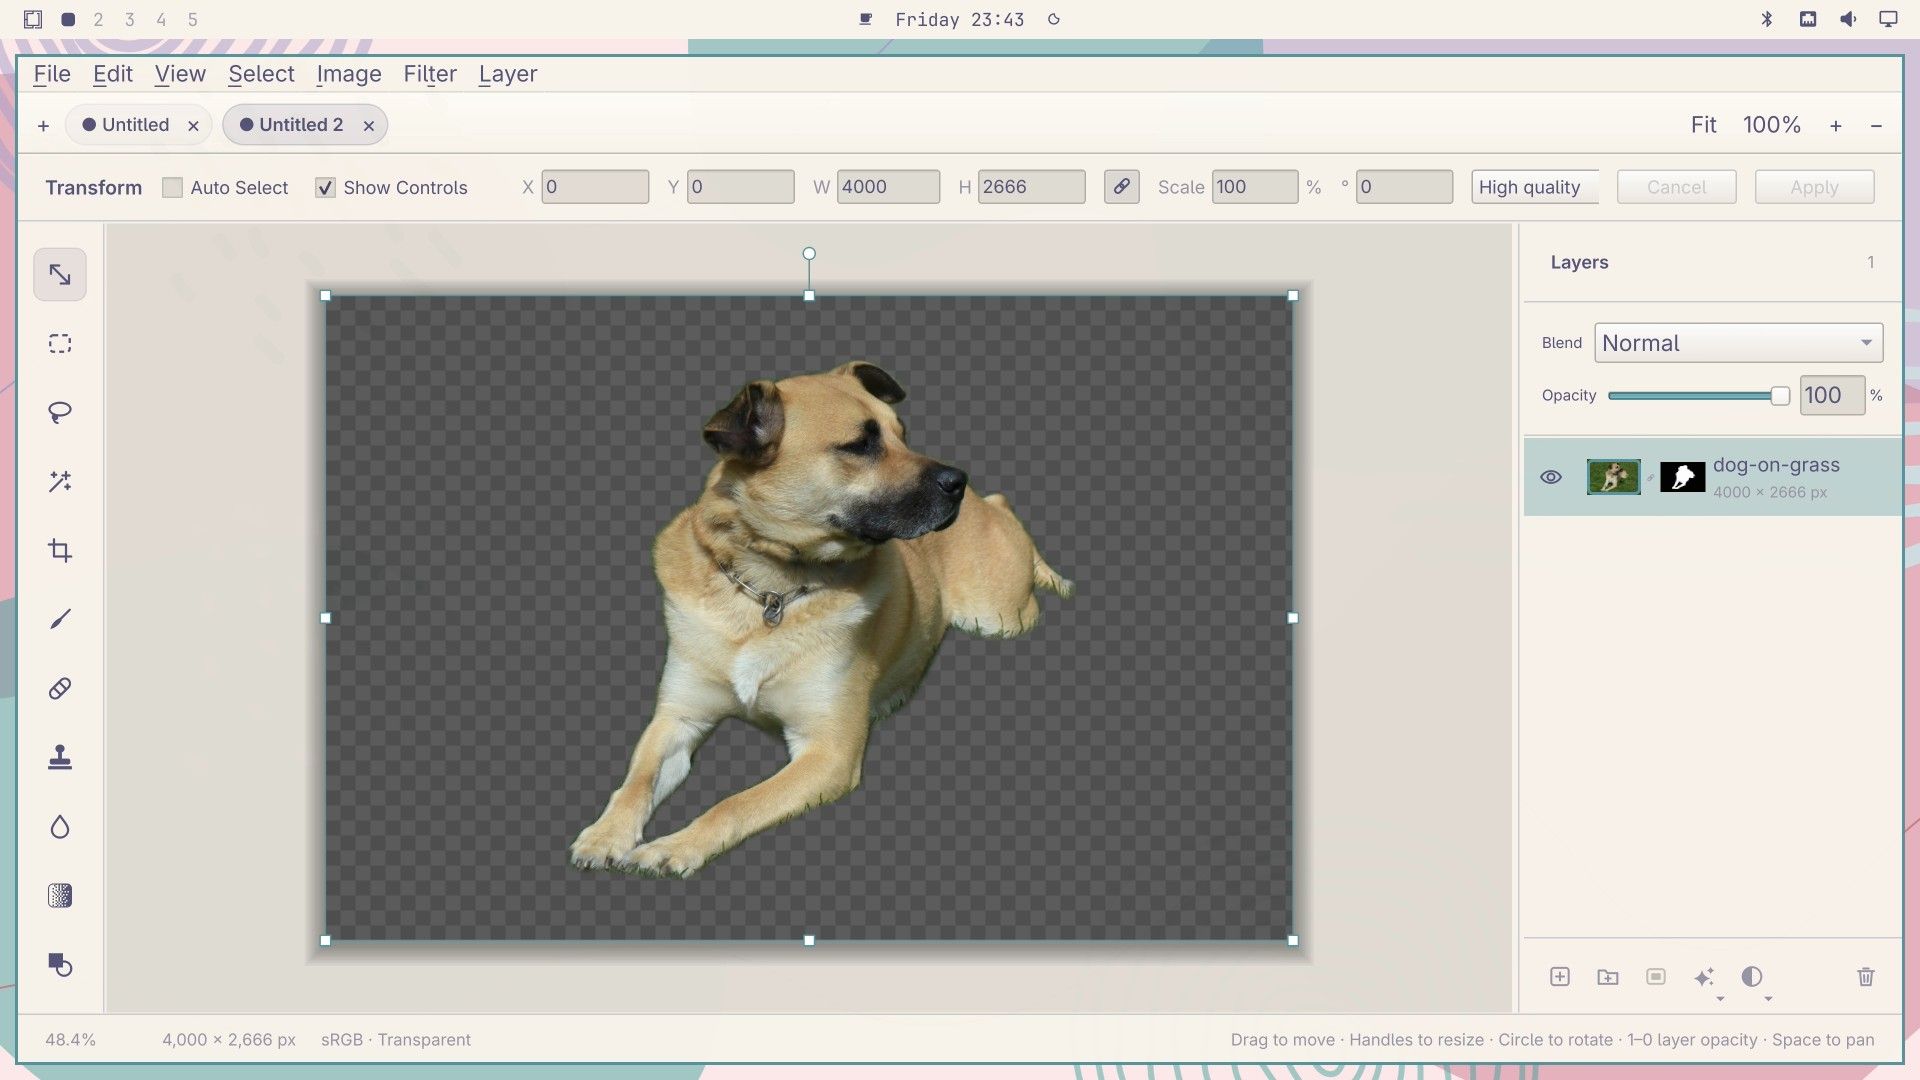
Press super ctrl shift space to open the theme menu, press the left arrow twice to reach Rose Pine (from Tokyo Night), and press enter . The top bar, the wallpaper, and the whole editor switched to Rose Pine’s light colors together, within about four seconds, with OmaPhoto still open. It reads the theme’s colors as they change, so there is no restart.
Remove OmaPhoto
To uninstall it, run:
sudo pacman -R omaphotopacman removes the program and the model. Your settings file stays at ~/.config/Unknown Organization/OmaPhoto.conf (the folder name is a default that Qt, the toolkit OmaPhoto is built on, uses when an app sets none). Delete that settings file and the arch.sh file from the install, and nothing of OmaPhoto is left.
Newer versions may move the menus
OmaPhoto was less than two weeks old when we filmed, and its first four releases came out within five days (1.0.0 on September 26 through 1.3.3 on September 30). The install command always fetches the newest release, so a newer version may have different menus than this guide. The README on GitHub already describes features from the next version, such as Select > Color Range, that were not in 1.3.3. If a menu item here is missing or has moved, check the releases page for what changed.
We used only the features in this guide. The README lists more, including PSD import, Select Subject, Content-Aware Fill, and a format for projects that other tools and AI agents can write; we did not test those.
Where to go next
If you are coming from Adobe’s apps, our look at running Lightroom on Linux covers the Wine route and the native RAW editors Darktable and RawTherapee. For more Omarchy apps, the Flea file manager guide installs and tests a keyboard-driven file manager, and the Omarchy 4 hardware guide lists mini PCs and laptops that run Omarchy well.