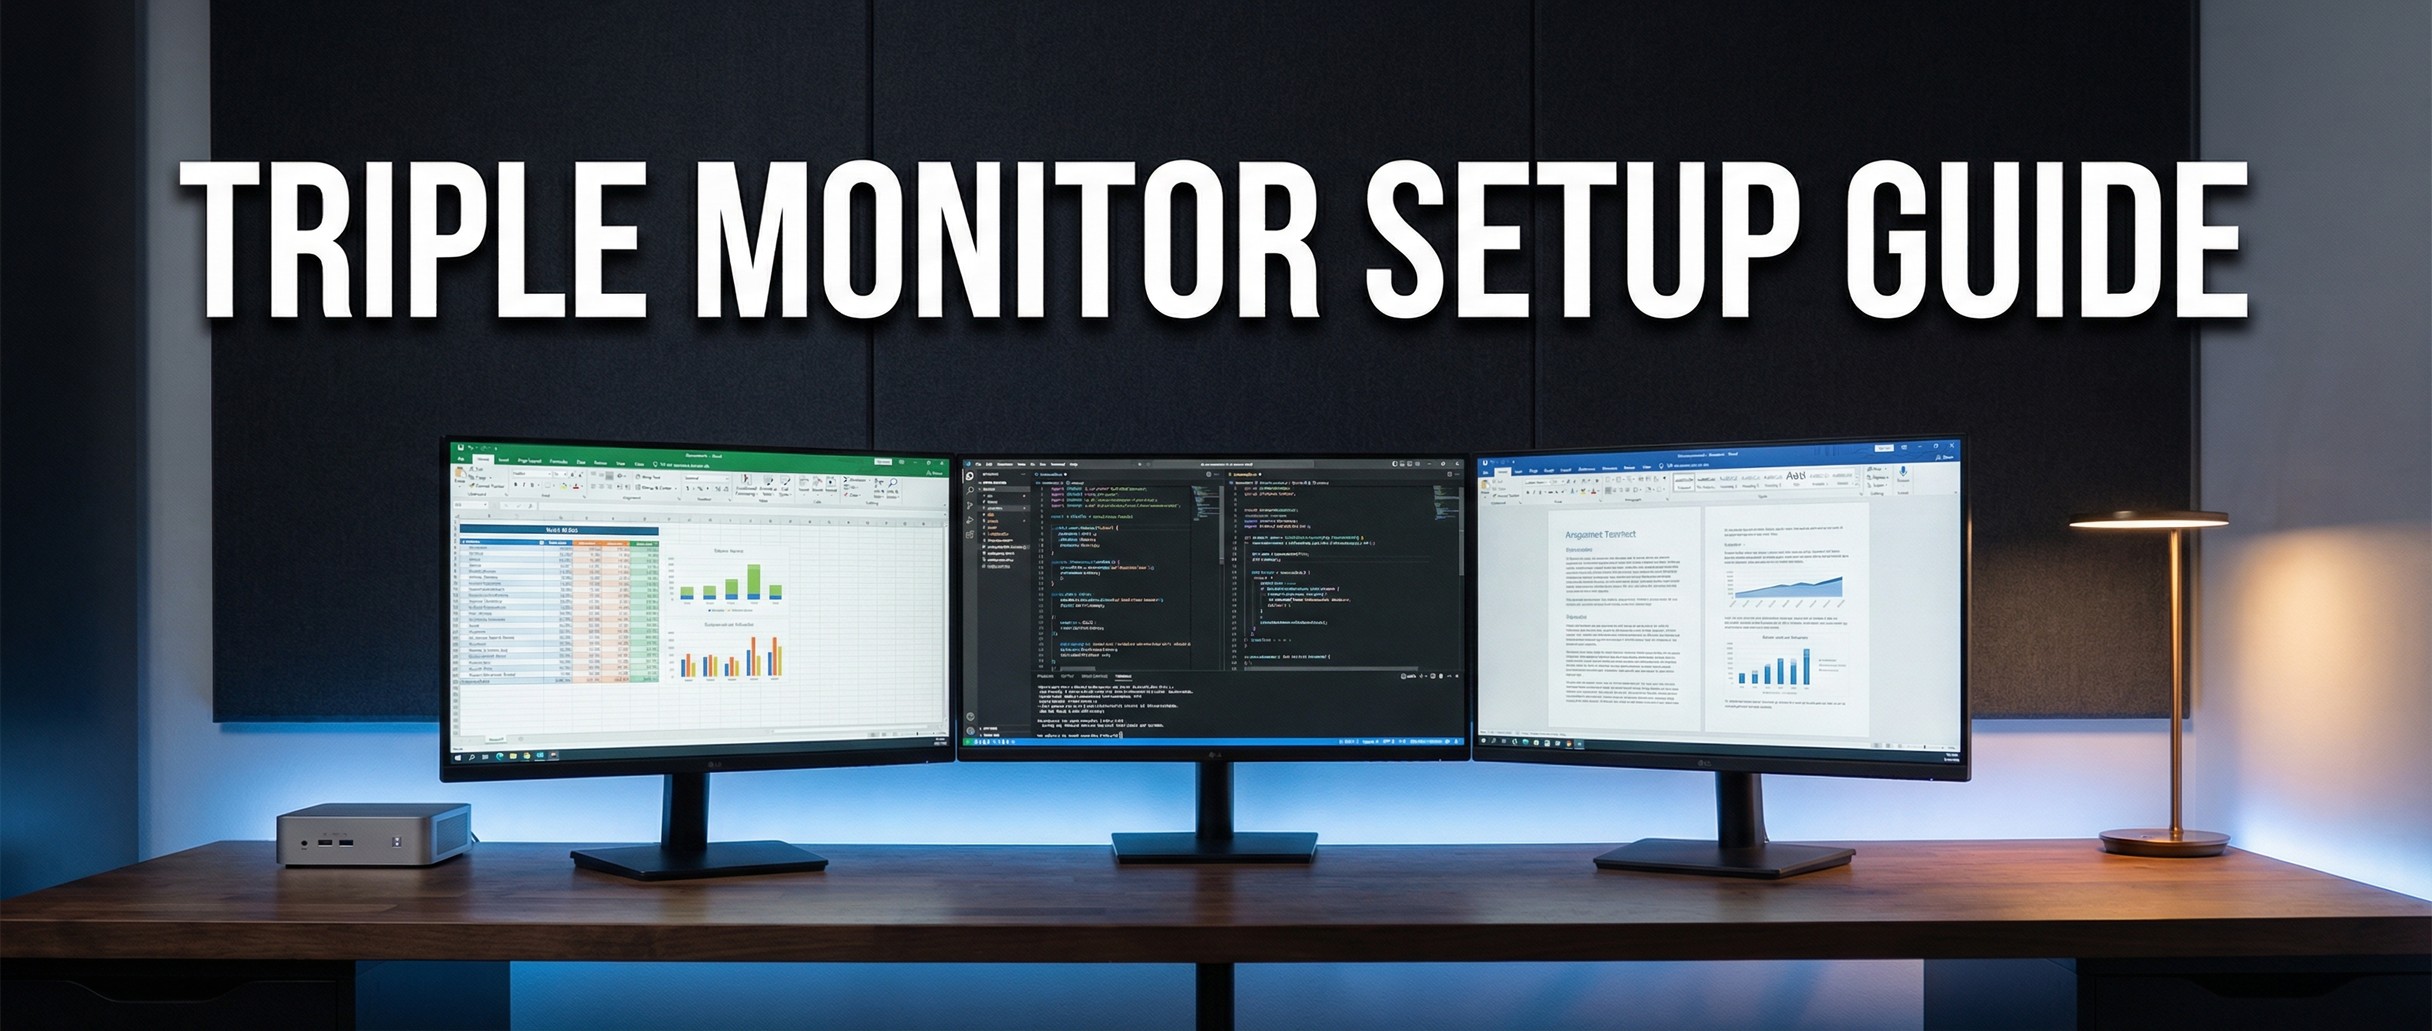
How much screen space you need depends on what you do. I have worked with multi-monitor setups for years. If your work involves juggling multiple applications, referencing documents while writing, or monitoring data streams, a triple monitor setup can cut down on window switching.
You don’t need a hulking desktop tower to drive three displays anymore. Modern mini PCs pack enough GPU power to handle triple 4K monitors while taking up less desk space than a coffee mug.
Give Each Screen a Job Instead of Chasing More Pixels
Research from the University of Utah found that workers with dual monitors were 44% more productive at text tasks and 29% faster at spreadsheet tasks compared to single-monitor users. Comprehensive studies specifically on triple monitors are less common, though the principle scales, up to a point. The zones matter more than the extra pixels. You can give each screen one job: your main work lives on the center screen, reference materials stay visible on the left, and communication tools occupy the right. No more Alt-Tab cycling through a dozen windows or losing your train of thought while hunting for that one browser tab.
Software developers keep a code editor, documentation, and a terminal or browser test window in view at once. In a meeting, a remote worker can join the call on one screen, read shared documents on the next, and take notes on the third, without the awkward shuffle of switching windows.
But I won’t pretend triple monitors are for everyone. If you’re constantly looking left and right throughout the day, your setup is wrong and you’ll end up with neck strain. More screens also mean more places for notifications to grab your attention, which can hurt focus if you’re not disciplined. For simple email and web browsing, a single good monitor is often sufficient, and the cost of three monitors plus mounting hardware adds up quickly. Ask whether your work needs several applications visible at once, or whether you’re just attracted to the aesthetics of a command center.
Triple Monitors vs. Ultrawide
A 49-inch ultrawide monitor offers similar horizontal real estate to two 27-inch monitors side by side. Triple monitors typically provide more total pixels, especially with 4K panels, and the physical bezels between screens make window snapping intuitive. You can angle individual monitors toward you and adjust their heights independently, so the side panels curve in around your field of vision.
Ultrawides simplify things: one cable, one power connection, one panel to manage. However, you’ll need third-party software to create virtual window zones since there are no physical dividers, and the viewing angle is fixed. The cost is roughly comparable: three decent 27-inch monitors run $450-$1,500 depending on resolution, while a quality 49-inch ultrawide falls in the $800-$1,500 range.
If you primarily work in three distinct applications and want them always visible without overlap, individual monitors win. If you work in one or two applications that benefit from expansive horizontal space (video editing timelines, music production, or spreadsheets with dozens of columns), an ultrawide makes more sense.
Output Count Decides Whether a Mini PC Can Drive Three Monitors
Manufacturers don’t always spell that count out, so read the port list before anything else on the spec sheet.
Three Video Outputs Drive Three Monitors Without a Dock
Mini PCs reach three video outputs five different ways:
- Three HDMI ports: simple, but increasingly rare
- Two HDMI plus one DisplayPort: common on mid-range models
- Two HDMI plus one USB-C with DisplayPort Alt Mode support: very common on current hardware
- One HDMI plus two USB-C ports: found on higher-end models
- HDMI, DisplayPort, and USB-C together: the most flexible combination
USB-C ports only work for displays if they specifically support DisplayPort Alt Mode. Many are data-only. Check the specifications carefully before assuming that USB-C port will connect to a monitor.
GPU Considerations
Three 4K monitors at 60Hz mean the GPU has to push 24.9 million pixels simultaneously, 8.3 million per display times three. For that you’ll want AMD Radeon integrated graphics with at least 12 compute units, Intel Iris Xe or newer, or a dedicated NVIDIA GPU (though those are rare in mini PCs).
The comfortable choices for triple 4K include AMD Ryzen 7 or 9 processors with Radeon 780M or 890M graphics, AMD Ryzen AI processors with RDNA 3.5 graphics, or Intel Core Ultra chips with Arc graphics.
Bandwidth matters too. Each HDMI 2.0 port maxes out at 4K at 60Hz. If you want 4K at 120Hz for smoother cursor movement and scrolling, you’ll need HDMI 2.1 or DisplayPort 1.4 or later.
Mini PCs That Work
Based on manufacturer specifications and user reports, several models reliably support three or more displays. For high-end setups with verified triple 4K at 60Hz, the Beelink SER7 with its Ryzen 7 7840HS has two HDMI 2.1 ports plus USB-C, and its HDMI outputs run 4K at 120Hz. The GEEKOM A7 with Ryzen 9 7940HS has four display outputs, two USB-C and two HDMI 2.0. The MINISFORUM UM790 Pro pairs the same Ryzen 9 7940HS with strong Radeon 780M graphics, two HDMI 2.1 and USB-C. Intel users have the NUC 13 Pro, where a Core i7-1360P sits behind two Thunderbolt 4 ports plus HDMI 2.1; those Thunderbolt ports daisy-chain if your monitors support it.
Mid-range options work well for triple 1080p or 1440p setups. The Beelink SER5 with Ryzen 5 5560U is a low-cost AMD option, with two HDMI and USB-C. The GEEKOM Mini IT13 with Intel Core i5-13500H sits in the middle on both price and performance. Budget models like the ACEMAGIC S1 with Intel N95 or N100 can handle triple 1080p, but don’t expect 4K capability from these entry-level chips. The DreamQuest Pro is worth noting for its three native HDMI outputs, making triple-display setup straightforward without adapters.
Always verify current specifications before purchasing. Manufacturers occasionally revise port configurations between production runs.
HDMI 2.0 or Better on Every Video Output
- HDMI 2.0 carries 18 Gbps, enough for 4K at 60Hz or 1440p at 120Hz
- HDMI 2.1 carries 48 Gbps, supporting 4K at 120Hz or even 8K at 60Hz
- DisplayPort 1.4 carries 32.4 Gbps, handling 4K at 120Hz natively
- Thunderbolt 3 and 4 carry 40 Gbps, sufficient for two 4K displays at 60Hz through a single port
That floor only matters once you go 4K. Older HDMI 1.4 ports will either limit you to 1080p or 1440p, or force 4K at 30Hz, which is choppy enough to be unusable for daily work.
Choosing the Right Monitors
27 Inches Is the Default Size for Triple Setups
Three panels side by side need a desk wide enough to hold them, which is where the size decision starts.
| Panel size | Desk width | Total width angled | Viewing distance |
|---|---|---|---|
| 24-inch | 60 inches | roughly 58 inches | 20-24 inches |
| 27-inch | 72 inches or wider | roughly 66 inches | 24-30 inches |
| 32-inch | dedicated wide desk | roughly 78 inches | 30-36 inches |
The 24-inch row suits space-constrained offices or triple 1080p setups. The 32-inch row assumes aggressive angling or a desk built for it, which is why those panels land with design work and with people who sit further back. Unless you have specific requirements for large panels, I recommend 27-inch monitors as the default choice for triple setups: monitor arms can position them properly, and 4K viewing stays comfortable without overwhelming a typical desk.
Resolution: Productivity vs. GPU Load
At 1080p on a 27-inch panel, you get 82 pixels per inch, acceptable but noticeably soft for text. It asks the least of the GPU, so it suits budget builds and general office work.
1440p (QHD) on 27 inches delivers 109 pixels per inch, sharp enough that scaling is not required. The GPU load is moderate, even mid-range mini PCs handle three of them comfortably, and you keep maximum usable workspace. For productivity work, this is where I would land.
4K (UHD) on 27 inches provides 163 pixels per inch, beautiful for design work, photography, and text-heavy tasks. Windows scaling (typically 150%) is required to make interface elements usable, which reduces your effective workspace, and the GPU works hardest here. Consider 4K only if you’re working with high-resolution media or using 32-inch monitors where the pixel density is lower.
Panel Types
IPS panels deliver excellent color accuracy and wide viewing angles of about 178 degrees. This matters when you’re constantly glancing between angled side monitors; the colors stay consistent regardless of viewing position. Contrast ratios are good at around 1000:1, and response times of 4-8ms are adequate for productivity work. IPS is the clear winner for multi-monitor productivity setups.
VA panels offer superior contrast ratios around 3000:1, producing deeper blacks in dark rooms or for media consumption. However, viewing angles are more limited at around 160 degrees, which means your angled side monitors may look washed out compared to the center screen.
TN panels have fast response times but poor viewing angles and mediocre color accuracy. They’re designed for gaming, not productivity. Avoid them for multi-monitor work environments.
Refresh Rate Considerations
For productivity work, 60Hz is adequate. Higher refresh rates provide smoother cursor movement and scrolling, but the benefit is subtle for office tasks. Consider 120Hz or 144Hz if you also use the workstation for gaming, if smooth scrolling is important to you, or if your mini PC’s GPU has headroom to spare. Don’t prioritize refresh rate if you’re budget-constrained (60Hz monitors cost less) or running triple 4K (the GPU bandwidth is better spent on resolution than refresh rate).
Monitor Recommendations
At the budget end around $150 each, the Dell SE2722HX is a reliable 27-inch 1080p IPS panel with good colors. Thin bezels and VESA compatibility come with the AOC 27B2H at the same price, while FreeSync support and solid build quality come with the LG 27MP400-B.
Mid-range monitors around $250 each open up better options. The Dell S2722QC is 27-inch 4K IPS with a built-in USB-C hub, and the LG 27UP850-W pairs USB-C connectivity with DisplayHDR 400 certification. If color accuracy is the priority, the ASUS ProArt PA278CV arrives factory-calibrated, 27-inch 1440p IPS.
Premium monitors at $400 and above include the Dell UltraSharp U2723QE, aimed at professionals who need accurate colors. Thunderbolt 3 daisy-chaining on the BenQ PD2725U keeps cable runs cleaner. The LG 27UK850-W has HDR10 support alongside USB-C connectivity.
Whatever you choose, ensure all monitors have VESA mounting holes (100x100mm is standard) if you plan to use monitor arms.
Connection Methods
Direct Connection
If your mini PC has three native video outputs, connecting directly is straightforward and reliable. For example, with a GEEKOM A7 featuring two HDMI and two USB-C ports, you’d connect your center monitor to HDMI 1, left monitor to HDMI 2, and right monitor via USB-C to DisplayPort cable.
For 4K at 60Hz, ensure HDMI cables are rated “High Speed” or “Ultra High Speed”; generic cables often can’t handle the bandwidth and cause flickering or blank screens. For USB-C connections, look for cables that explicitly advertise DisplayPort Alt Mode support. Spending an extra $10-15 per cable saves hours of troubleshooting later.
USB-C Port Support Ranges From One Display to Two
Standard USB-C with DisplayPort Alt Mode supports one display; this is what you’ll find on most mid-range mini PCs. USB-C with DisplayPort 1.4 Alt Mode can support one or two displays via Multi-Stream Transport (MST) on higher-end AMD and Intel systems. Thunderbolt 3 and 4 support two displays and enable daisy-chaining on monitors with built-in Thunderbolt connections.
If your monitors support Thunderbolt, you can connect mini PC to Monitor 1 to Monitor 2 with single cables between each, eliminating the spider web of cables running back to your computer.
Docking Stations
If your mini PC has only two display outputs, a dock can add more, but this approach has tradeoffs. USB-C docking stations with DisplayLink or InstantView technology add virtual displays over USB. They work, but add processing overhead, may introduce slight display lag, and require driver installation. The experience isn’t quite as smooth as native connections.
Thunderbolt docks pass through native display signals without overhead, making them more reliable. The CalDigit TS4 provides three DisplayPort plus one HDMI. The Kensington SD5780T offers two HDMI and two DisplayPort. However, quality Thunderbolt docks cost $200-400.
My recommendation: if you need a dock specifically for extra displays, invest in a mini PC with three native outputs instead. It’s more reliable and often costs the same once you factor in dock pricing.
Cable Requirements and Length Limits
For 4K at 60Hz, HDMI connections need cables rated for HDMI 2.0 High Speed; look for “Premium High Speed” or “Ultra High Speed” certification. DisplayPort cables should be VESA certified and rated for 32.4 Gbps. USB-C to DisplayPort cables need USB-C 3.1 or newer with DisplayPort 1.2 or later, with “Supports 4K@60Hz” explicitly stated. Thunderbolt cables should be passive 40 Gbps rated and Intel or Apple certified.
HDMI maintains signal integrity up to about 15 feet for 4K. DisplayPort drops to 6 feet at 4K without active signal boosting. USB-C maxes out at 6 feet for full bandwidth. Thunderbolt similarly limits to 6 feet. For longer runs, you’ll need active cables or fiber optic HDMI cables, which cost significantly more.
Physical Setup
Desk Space
Your desk needs to accommodate three monitors plus your mini PC and peripherals. For 24-inch monitors, plan on at least 60 inches of desk width and 24 inches of depth. Twenty-seven-inch monitors require 72 inches of width and 30 inches of depth. Thirty-two-inch monitors need 84 inches of width. If using monitor arms that clamp to the desk edge, add 3-4 inches to the required depth for the clamp mechanism.
Monitor Arms vs. Stands
Using the built-in stands that come with your monitors costs nothing extra and involves simple setup. However, the stands consume significant desk space, offer limited adjustability, and heights between different monitor brands rarely match properly.
Monitor arms free up desk space for other items, allow precise positioning and easy adjustment, make it simple to angle side monitors toward you, and typically include cable management channels. The downsides are additional cost ($100-$300 depending on quality), the requirement for a sturdy desk that won’t flex, and more complex installation.
For triple arm mounts using a single pole with three arms, the VIVO Triple Monitor Desk Mount at around $70 holds 13-27 inch monitors adequately. The ERGOTRON LX Triple at $400 provides premium quality but only fits 24-inch monitors. The HUANUO Triple Monitor Stand at around $90 offers gas spring adjustment suitable for 27-inch monitors.
Individual arms provide maximum flexibility for angling side monitors but cost more overall. The Amazon Basics Monitor Arm at about $110 each delivers solid quality for single 27-inch monitors. The ERGOTRON LX Single at about $180 each provides premium build quality with excellent cable management.
My preference leans toward three individual arms for the flexibility to position each monitor exactly where I want it, but a triple mount is more economical and creates a cleaner look if adjustability isn’t a priority.
Cable Management
With three monitors and a mini PC, you’re managing at least three display cables, three power cables, the mini PC’s power cable, and potentially USB hub cables and peripheral connections. This can become chaotic quickly.
Under-desk cable trays hold power strips and excess cable length out of sight. Velcro straps bundle cables together without the permanence of zip ties, making changes easier later. Cable sleeves hide multiple cables in a single fabric covering. Most monitor arms include integrated cable clips or channels for routing cables along the arm.
Connect all cables before mounting the monitors on arms. Routing cables through arm channels is far easier with the monitors unmounted.

Mini PC Placement
Most mini PCs include VESA mounting adapters, allowing you to attach the computer to the back of your center monitor. This hides the PC completely and keeps cable runs short. However, ensure you leave at least 2 inches of clearance around the mini PC for ventilation; blocking airflow leads to thermal throttling and reduced performance.
Under-desk mounting works well if you prefer the computer out of sight but want easier access to USB ports; velcro strips or a small bracket keep the unit secure, at the cost of more dust and a power button you have to reach for. Traditional on-desk placement beside your monitors is simplest for accessing USB drives, headphones, and the power button, and you pay for that in visible cables and desk space.
Ergonomic Positioning
Poor ergonomics negate the productivity benefits of multiple monitors. Getting this wrong means neck strain and eye fatigue, bad enough that you avoid using the setup you invested in.
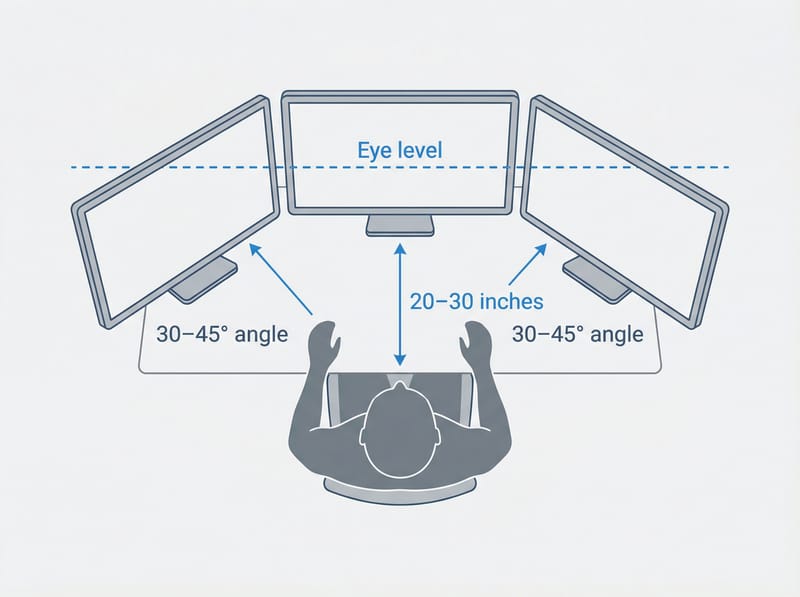
For vertical positioning, the top of your center monitor should sit at or slightly below eye level. Side monitors should match the center monitor’s height. Your eyes should naturally rest at a slight downward gaze of 10-20 degrees when looking at the center of any screen.
Horizontally, position the center monitor directly in front of you with side monitors angled 30-45 degrees inward. When you look at any monitor, you should face it with minimal neck rotation; your whole upper body should turn slightly rather than just your head.
Distance matters too. Sit 20-30 inches from your center monitor, with side monitors naturally slightly further due to their angle. Text should be comfortably readable without leaning forward. If you’re squinting or craning your neck, something is wrong.
The 20-20-20 rule applies regardless of how many screens you have: every 20 minutes, look at something 20 feet away for 20 seconds.
Lighting
Avoid placing windows directly behind your monitors, as this causes glare and creates silhouetting that makes the screens hard to see. Bright lights that reflect off the screens are equally problematic, as are dramatic brightness differences between your screens and the room around them.
The ideal setup includes bias lighting (LED strips in the 6500K color temperature range) behind your monitors to reduce eye strain from brightness contrast. Indirect ambient lighting keeps the room comfortable without creating reflections. Window light works best from the side, not behind or directly in front of your monitors. Match brightness levels across all three monitors so your eyes don’t constantly adjust when glancing between screens.
Software Configuration
Windows Display Settings
Once your monitors are physically connected, Windows should detect all three automatically. To configure the arrangement, right-click on your desktop and select Display settings. Click “Identify” to see numbers appear on each screen, then drag the monitor icons to match your physical layout; this ensures your cursor moves naturally between screens.
For each monitor, set the resolution to its native value and configure scaling appropriately. For 1080p and 1440p monitors, 100% scaling is ideal. For 4K at 27 inches, 150% scaling makes text readable while maintaining reasonable workspace.
To set your main display, click on the center monitor icon, scroll down to “Multiple displays,” and check “Make this my main display.” This is where your taskbar lives by default and where most applications open.
For the taskbar, right-click it and select Taskbar settings. Under “Multiple displays,” toggle “Show taskbar on all displays” if you want consistent access across screens. Setting taskbar buttons to “Taskbar where window is open” reduces visual clutter by only showing application icons on the monitor where that window is located.
Linux Multi-Monitor Configuration
Linux multi-monitor support varies by display server. X11 is the traditional option with the broadest compatibility across distributions. Configure it through Settings, Displays in your desktop environment, or use arandr for a graphical tool. For advanced configuration, edit /etc/X11/xorg.conf or use xrandr commands directly:
# Example: Set up three monitors with xrandr
xrandr --output HDMI-1 --mode 2560x1440 --pos 0x0 --rotate normal \
       --output HDMI-2 --mode 2560x1440 --pos 2560x0 --rotate normal --primary \
       --output DP-1 --mode 2560x1440 --pos 5120x0 --rotate normal
Wayland offers better performance and native fractional scaling, though not all applications are fully compatible yet. GNOME and KDE both provide graphical display configuration under Settings or System Settings. Most Wayland compositors auto-detect monitors and arrange them sensibly.
Common troubleshooting issues include monitors not being detected (check xrandr or wlr-randr output), incorrect resolutions (install proper AMD or Intel graphics drivers), and arrangements resetting on reboot (save xrandr commands in ~/.xprofile or use autorandr to manage profiles).
Monitor Matching and Scaling
Use the on-screen display menus to match brightness levels across all three panels, and set identical color temperatures (6500K is standard, warmer works better for evening use). If color accuracy matters for your work, hardware calibration is worth the investment.
Windows scaling can create issues when mixing different resolution monitors or when different scaling percentages are applied. Keep all monitors at the same scale when possible to avoid blurry windows when dragging between screens. If you must mix resolutions, note that 4K at 200% scale roughly matches 1080p at 100% scale, making dragging between them smoother.
Productivity Software
Microsoft PowerToys is free and includes FancyZones for creating custom window snap zones, PowerToys Run for quick application launching with Alt+Space, and Awake to prevent your PC from sleeping during long tasks.
DisplayFusion at $29 provides advanced multi-monitor taskbars, sophisticated window snapping and positioning, monitor profiles for different arrangements based on tasks, plus screensaver and wallpaper management.
On Linux, tiling window managers like i3 or Sway automatically fill screen space with application windows, eliminating manual positioning entirely. The learning curve is steep, but power users (especially developers who live in the terminal) find them more efficient than traditional floating window managers.
Virtual desktops multiply your available workspace further. On Windows, Win+Tab shows all desktops and Win+Ctrl+Left/Right switches between them. Combine virtual desktops with triple monitors for organization like Desktop 1 for main work, Desktop 2 for communication, and Desktop 3 for reference materials.
Workflow Optimization

Application Placement Strategies
The Command Center layout places email, chat, and calendar on the left monitor for communication awareness. Your primary work application (IDE, spreadsheet, or document) occupies the center monitor where you spend most of your focus. The right monitor holds browsers, reference materials, and secondary applications. This works well for knowledge workers who need to stay responsive while doing focused work.
Trading and DevOps work, where awareness of changing data matters, reward a different arrangement. The Peripheral Vision layout gives the left monitor to dashboards, stock tickers, or analytics that need periodic glances but not constant attention, keeps primary work center, and leaves video calls, notifications, and non-urgent items on the right.
The Immersive layout spans a single application across all three monitors: Photoshop, video editing software, or a trading platform. Most professional applications support multi-monitor spanning through their built-in features. Use it when one application dominates your entire work session.
For researchers and writers, the Research layout places source documents and PDFs on the left, your writing application center, and outline, notes, or citations manager on the right. Everything you need is visible at once.
Keyboard Shortcuts
A few keyboard shortcuts move windows across three monitors faster than dragging them. On Windows, Win+Shift+Arrow moves the active window to the next monitor instantly. Win+Arrow snaps windows to half of the current monitor. Win+Home minimizes everything except your active window for distraction-free focus. Alt+Tab switches between recent windows across all monitors, while Win+Tab opens Task View showing everything.
On Linux with GNOME, Super+Shift+Arrow moves windows between monitors. Super+Arrow tiles windows within a monitor. Super+Home jumps to the first workspace. Alt+Tab cycles through applications.
Defining Monitor Roles
Treat each monitor as having a dedicated purpose rather than just being extra space for overflow. The center monitor is for whatever you’re actively creating; it receives your full attention and should stay clean and distraction-free. The left monitor provides context and supporting information for your main task: references, documentation, data sources. Glance at it occasionally but don’t live there. The right monitor handles communication: email, chat, video calls, calendar, and to-do lists. These are things you need to see but not act on immediately.
Keep distractions off the side monitors. If Twitter or Reddit lives in your peripheral vision, you will look at it. The productivity benefit of triple monitors depends on using that space for work, not multiplying your opportunities for distraction.
Troubleshooting Common Issues
Displays Not Detected
Start with the basics. Confirm the cable is fully seated at both ends; unplug and replug firmly. Verify the monitor is powered on and set to the correct input source. Restart your computer after connecting new monitors, as some configurations don’t take effect until reboot.
In Windows, open Display settings and click Detect to force a rescan. If that fails, open Device Manager, expand Display adapters, right-click your GPU, and select Scan for hardware changes. In Linux, run xrandr or wlr-randr to see what the system detects, and check dmesg | tail -50 for connection errors immediately after plugging in.
If troubleshooting doesn’t help, try a different cable; cables fail. Test the monitor with a different source like a laptop or a gaming console to confirm the monitor itself works. Update your GPU drivers, especially for AMD Radeon and Intel integrated graphics. For USB-C connections, double-check that the specific port supports DisplayPort Alt Mode; not all do.
Resolution or Refresh Rate Limitations
Symptoms include a 4K monitor stuck at 30Hz with choppy cursor movement, inability to select native resolution, or resolution options mysteriously missing.
The most common fix is replacing your HDMI cable with one rated for HDMI 2.0 or higher; generic cables often can’t sustain the bandwidth for 4K at 60Hz. Use DisplayPort instead of HDMI when possible since it provides higher bandwidth. Update GPU drivers, as AMD and Intel frequently release updates that improve multi-monitor support. In Windows, try Advanced display settings, then Display adapter properties, then List all modes to see every resolution and refresh rate combination your setup supports.
Scaling Problems
When text appears blurry on some monitors or when moving windows between screens, scaling inconsistencies are usually the cause.
In Windows, use the same scaling percentage on all monitors when possible. For stubborn applications, right-click the executable, select Properties, navigate to Compatibility, then Change high DPI settings, and check Override system DPI. Avoid mixing scaled and unscaled monitors in the same setup.
In Linux, Wayland handles fractional scaling better than X11. If you’re stuck on X11, consider setting all monitors to 1x scaling and increasing font size in your desktop environment settings instead of relying on display scaling.
Performance Impact
If your system feels sluggish with three monitors, check Task Manager for GPU utilization. For normal desktop work, utilization should stay under 30%. If the GPU is maxing out just displaying the desktop, consider reducing resolution on one or more monitors.
Ensure your mini PC has adequate cooling; thermal throttling kills performance. Close hardware-accelerated applications you’re not actively using, as Chrome in particular consumes GPU resources even when minimized. In Windows, disable transparency effects through Settings, Accessibility, Visual effects.
Each 4K monitor adds roughly 33MB to video memory usage for the frame buffer alone. Chrome with many tabs uses additional GPU memory per monitor. For heavy multitasking, 16GB of system RAM is the realistic minimum; 32GB is more comfortable for creative work.
Complete Build Examples
Prices reflect late 2025 market conditions, though rising DRAM costs may push mini PC prices higher in 2026.
Budget Build: Around $570
This build targets functional triple monitor capability for office work, email, and web browsing. The Beelink EQ12 Pro with Intel N100 at $180 provides adequate processing power for basic tasks. Three AOC 24B2H monitors (24-inch 1080p IPS) at $90 each total $270 and deliver decent image quality with VESA mounting. A VIVO Dual plus Single Arm combination at $70 handles mounting, and $50 covers cables and a surge protector.
It is 1080p only, it slows down noticeably with many browser tabs, and there is no 4K upgrade path. But for basic office work, this setup handles email, documents, and web browsing across three screens without issue. It suits students, retirees, or anyone on a strict budget.
Mid-Range Build: Around $1,180
Comfortable daily productivity on sharp 1440p displays starts with the Beelink SER5 MAX and its Ryzen 7 5800H at $380, which stays smooth under demanding workloads. Add three Dell S2722DGM monitors (27-inch 1440p VA) at $200 each for $600, the HUANUO Triple Monitor Mount at $90 for gas spring adjustment, and $110 for cables, a USB-C hub, and cable management supplies.
This configuration handles Office applications, browser workloads, video conferencing, and light photo editing. The 1440p resolution is sharp, and the Ryzen 7 has headroom for multitasking. Remote workers, developers, and most knowledge workers are the target.
Premium Build: Around $2,380
This build targets high-resolution 4K output for design work and power users. The GEEKOM A7 with Ryzen 9 7940HS at $700 delivers top-tier integrated graphics capable of driving triple 4K smoothly. Three LG 27UP850-W monitors (27-inch 4K IPS with USB-C) at $300 each total $900 and provide excellent color accuracy. Three ERGOTRON LX Single arms at $180 each, $540, deliver premium build quality and smooth adjustment. The CalDigit Element Hub at $150 provides Thunderbolt connectivity for accessories. Budget $90 for premium cables, cable management, and bias lighting.
This setup handles creative applications (photography, design, video editing) with room to spare, which is what designers, photographers, video editors, and trading professionals are after. The 4K resolution makes text crisp and high-resolution images look sharp.
Buy Cables Rated for the Bandwidth You Need
Buy HDMI 2.0 and USB-C cables rated for the bandwidth you need, and skip the troubleshooting later. There’s no universal “best” monitor layout, so arrange the screens around your own workflow.
Frequently Asked Questions
Can a mini PC run 3 monitors?
Yes, as long as the box has three video outputs. The usual combinations are two HDMI plus one DisplayPort, or two HDMI plus one USB-C that supports DisplayPort Alt Mode; a data-only USB-C port will not drive a display. Entry-level chips like the Intel N95 and N100 can run triple 1080p, but not triple 4K.
Can I connect 3 monitors to 1 PC without a dock?
No dock is needed when the mini PC has three native video outputs. On a box with two HDMI and two USB-C ports, run the center monitor to HDMI 1, the left monitor to HDMI 2, and the right monitor over a USB-C to DisplayPort cable. With only two outputs, a dock can add a third, though DisplayLink docks add processing overhead and quality Thunderbolt docks cost $200 to $400.
What does a mini PC triple monitor setup need for 4K at 60Hz?
Three 4K panels at 60Hz put 24.9 million pixels on screen at once, so you want AMD Radeon integrated graphics with at least 12 compute units, Intel Iris Xe or newer, or a dedicated NVIDIA GPU. Every output has to be HDMI 2.0 or better, because older HDMI 1.4 ports either cap you at 1080p or 1440p or force 4K at 30Hz. Use HDMI cables rated “High Speed” or “Ultra High Speed” so the cable is not the bottleneck.
Are three monitors better than one ultrawide?
Neither wins outright. Three monitors give you more total pixels, physical bezels that make window snapping intuitive, and the ability to angle and raise each panel independently. An ultrawide is simpler to live with, one cable and one panel, but the viewing angle is fixed and you need third-party software to create window zones. Go with three panels if you keep three applications open side by side all day.